Feb 26, 2016
About Life’s a Blur: A photography series that experiments with long exposures and motion blur. Every photo is a combination of movement mixed with a still subject. I’d like to think of each photo like a meditation: stillness in a sea of chaos.
These photos are also part of my Photo and 100 Words project. Since January 2014, I’ve been creating a new photo and writing about it every week. If you’re interested in finding out what prompted me to begin you can read the introduction over here.
(If you’re new to this photography series you might want to read how it all began in Part 1)
This photo is for sale… click on it for more details OR read the original post I wrote about it: “Reaching for Dreams“
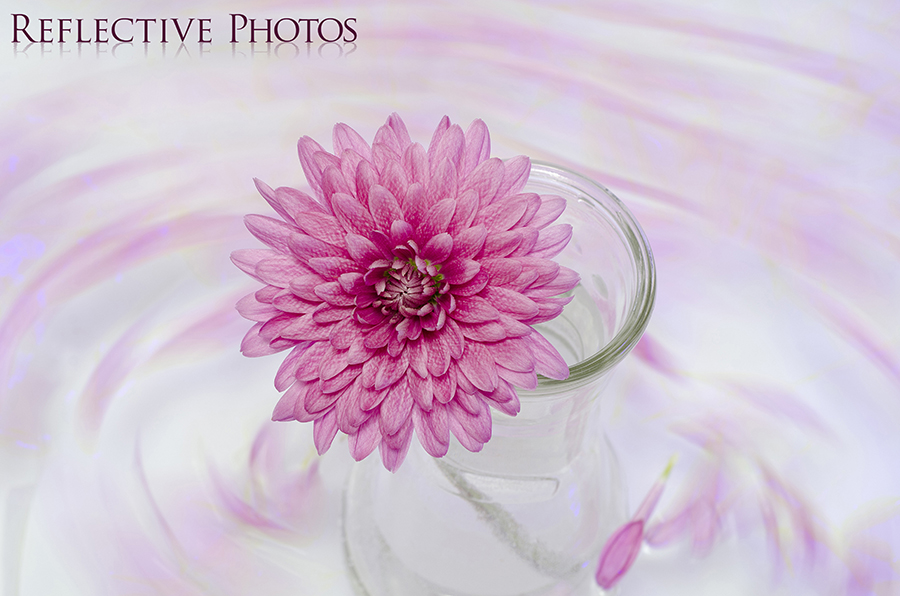
The concept seemed simple: make it rain. The execution was a bit more complicated, but that was mostly my own fault…
I started out with a bouquet of flowers, a purple backdrop, and a pile of homemade confetti made by sending some construction paper scraps through our paper shredder. Shout out to Nick for simplifying that process! I had intended to use scissors.
I planned on taking long exposures of the flowers and dropping the confetti in the background to create a streaky, rainy effect.
It was only as I was pulling my flashes out of my bag, that I realized I had already run into a problem! I forgot to bring home hot lights from the studio.
A Lesson in Lighting
For those of you who are new to off-camera lighting, there are generally two options: strobes and constant light. The main difference being that constant light stays on and strobes only flash when the camera takes a photo.
There are lots of reasons you might consider using one over another, but for the purposes of this example I needed constant light because I intended to capture long exposures. Flashes tend to freeze motion and would totally negate the soft effect I was going for.
I could’ve waited for the next weekend to come around… or maybe not, I don’t really remember what I had going on at the time, but I don’t have that kind of patience anyway! And so the problem-solving began…

I decided to use my living room lamp as a constant light source. It had three bulbs on it and they were semi-adjustable, so I turned all three of them on and pointed them in the same general direction to even out the lighting on my backdrop. More importantly, the lamp was also going to be lighting the confetti in the background.
The next problem was two-fold. I only had one lamp, so that meant I had to use at least one flash to light up the flower.

First of all, mixing light sources is generally not a good idea because every light has its own colorcast. The lamp was putting out yellowy light compared to the bluish light my flash puts out.
I fixed that issue by balancing the lights with gels, which are just colored sheets of transparent plastic. It just takes a bit of time and experimentation to get it right, but I ended up covering all of the lamp lights with blue gels to negate the yellow, and I did the opposite with my flash by covering it with a yellow gel.

The second problem with using a flash on the flower was that I was also blasting the confetti with the flash too. This created a simultaneously soft and frozen look; there were streaks of color from the confetti lit by the lamp, but there were also hard dots specked across the background that froze when the flash fired. Awesome effect, but it’s not what I wanted.
I had to experiment with some matte board to find the sweet spot where I would block the flash from hitting the confetti but still allow enough light onto the flower. Eventually I got it right!

Then I added in another matte board, covered in aluminum foil, to fill in the right side of the background and bounce more lamp light back into the confetti. I’m sure I had to tweak that angle too, in order to avoid bouncing any light from the flash into the confetti as well.
You might also see that I have a giant reflector above the whole set, and I can’t remember what that was for, but I’m going to assume it was further flash blockage, and lamp light bounceage, on the background area.
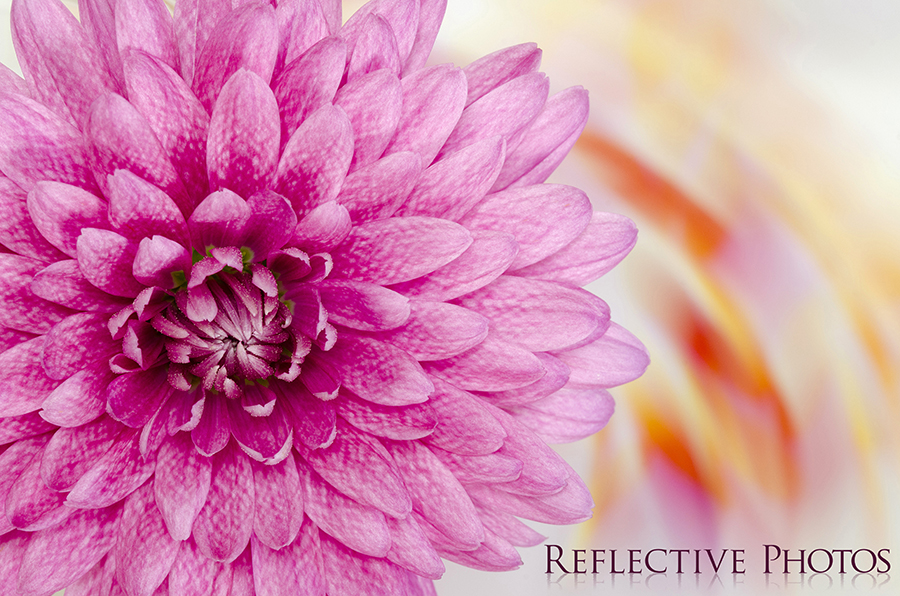
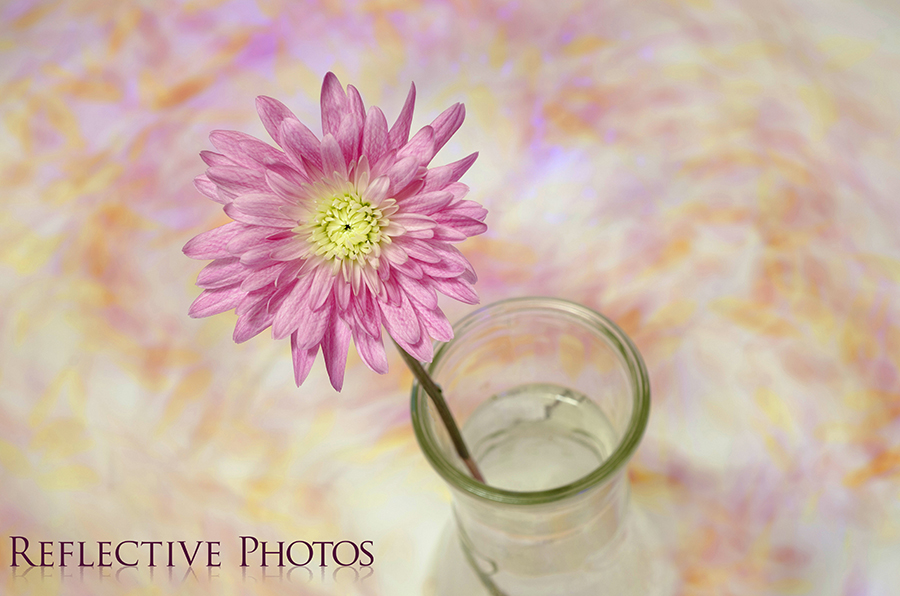
More Photos Made from this Setup:
Click the links below each image to read the original 100 words of reflection they inspired! Each image is also available in my art shop, so just click on the images if you are interested in purchasing any of these for you wall.
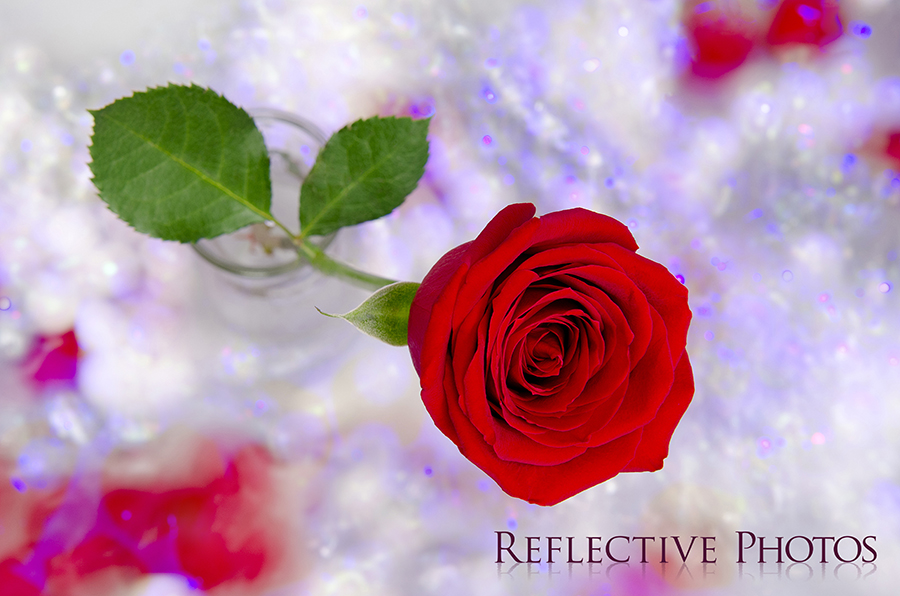
Warm Rain on a Cool Night
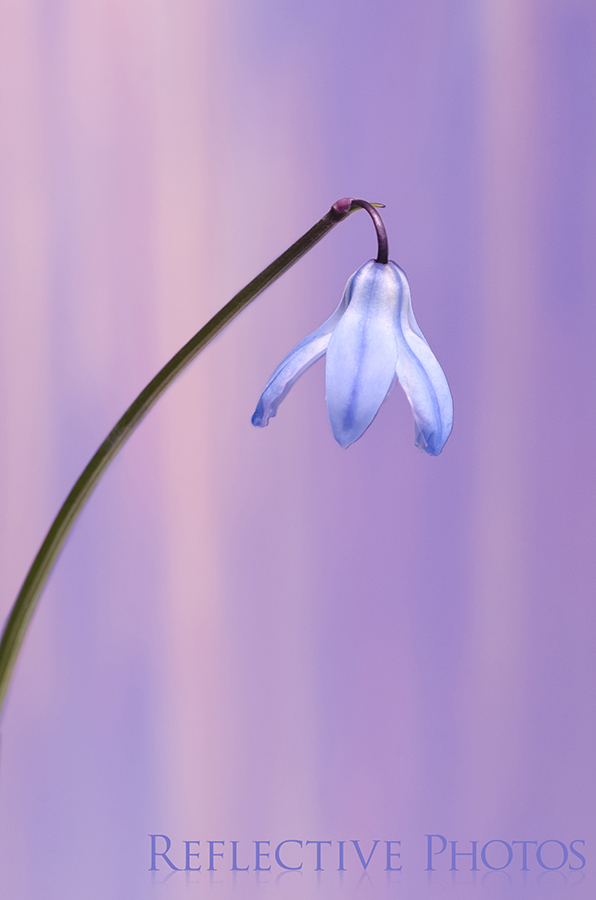
This photo is for sale… click on it for more details.
This image came out alongside my 100-word perspective on why “Rain is Never Gray.”
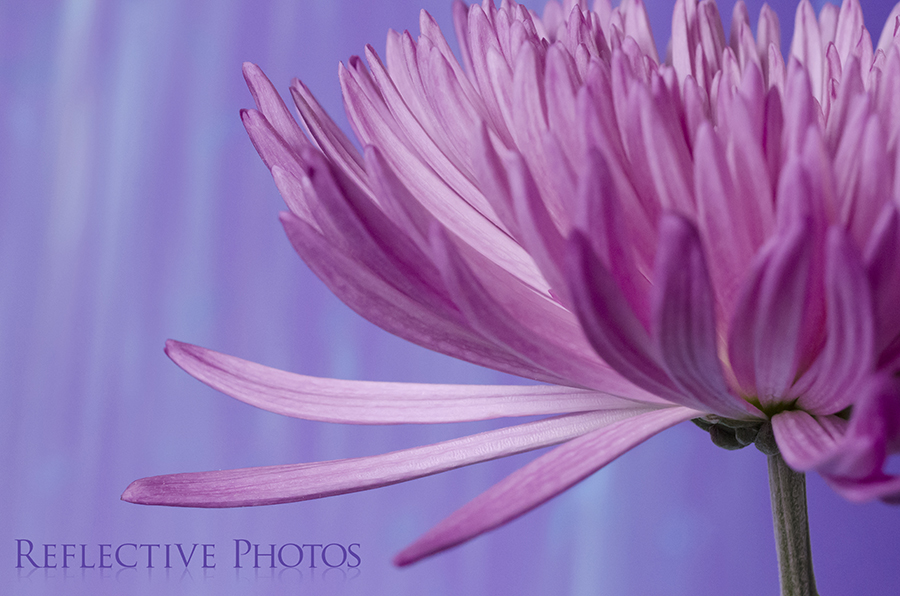
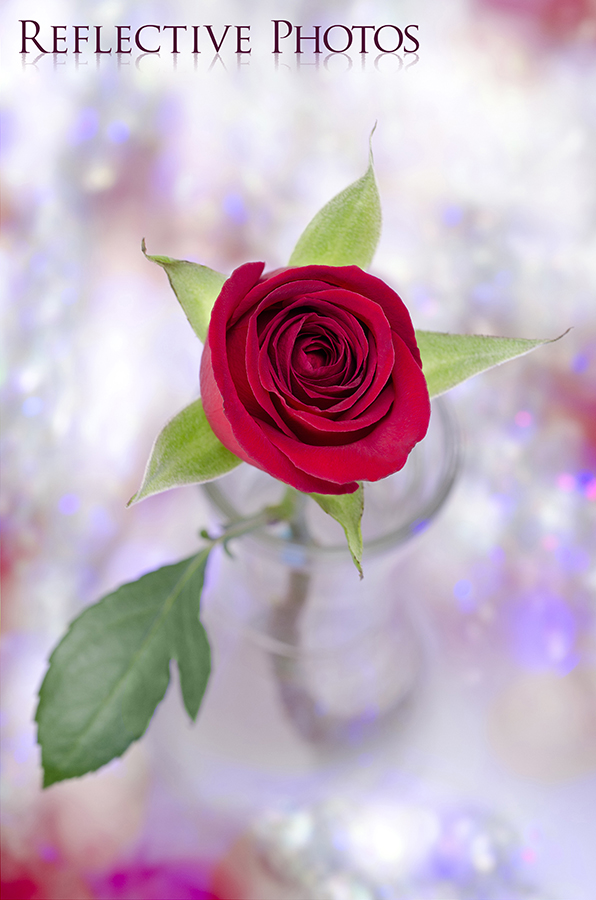
Towering Twin Flowers
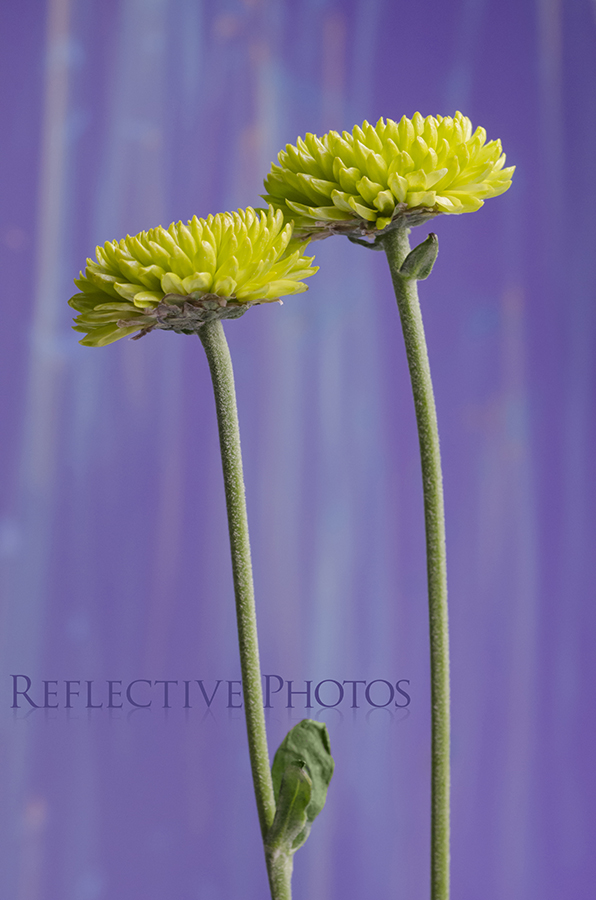
This photo is for sale… click on it for more details.
I have a strong dislike of green backgrounds… and you can read why in “Naturally Unnatural.”
Surreal Showers on Flowers
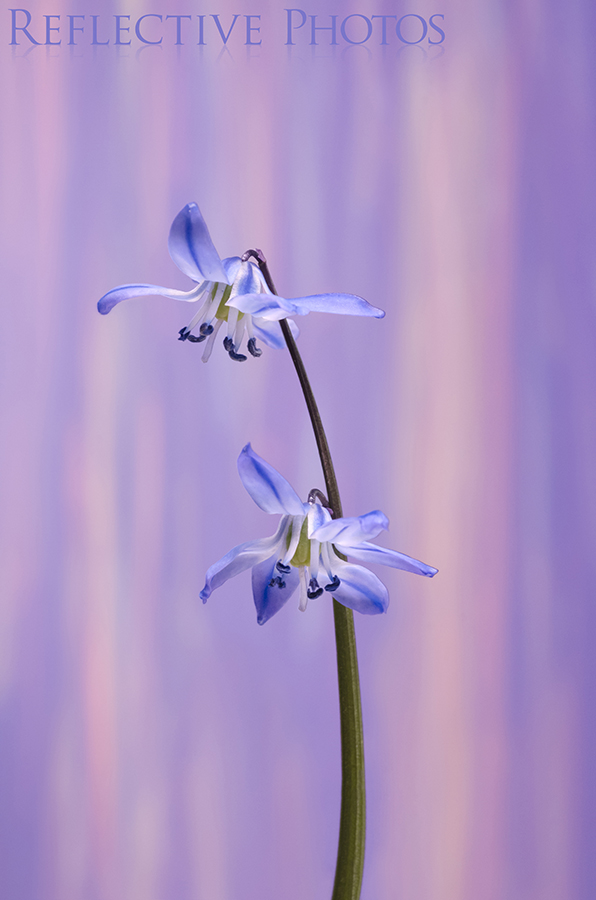
This photo is for sale… click on it for more details.
I’m constantly amazed at how much more I have yet to discover in my own back yard, that’s what I wrote about in “Spring Sprung New Flowers,” when this photo was first published.
Starfighter Lily Fights the Blues
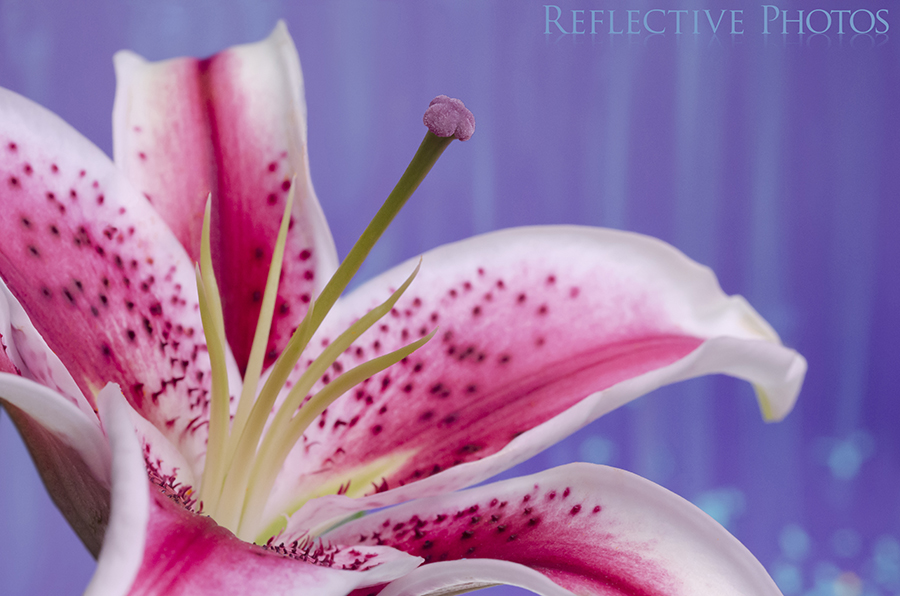
This photo is for sale… click on it for more details.
I hate when my fellow creative use lack of inspiration as an excuse not to create, and that’s what I wrote about Inspiration is for Lazy Artists.
Learn from My Mistakes!
If I had it to do over, I would NEVER do it this way! It’s a great example, though, of how anything is possible with a little creativity and what you already have.
This is also the last time you’ll see behind the scenes photos in my old studio – ahem – kitchen/living room. All future photos will show off my new studio space! I don’t know about you, but that gives me reason for celebration!
What’s Next?
You’ll get to see what my spring scenes looked like before and after I blurred them in my camera. The technique is the same one I used for parts 2 and 4 in this series, so check the links below if you want to learn more.
This will be the last behind the scenes post about the Life’s a Blur series. If you’re new here, though, you might’ve missed my previous posts on creating motion blur with long exposures!
How it All Began – Life’s a Blur – Behind the Scenes – Part 1
Fall Scenes – Life’s a Blur – Behind the Scenes – Part 2
Water Flow and Flowers – Life’s A Blur – Behind the Scenes – Part 3
How to Photograph Snowflakes – Life’s A Blur – Behind the Scenes – Part 4
Update: Part 6 is now available if you want to get a glimpse behind the spring set of Life’s a Blur!
Jun 2, 2015
About Life’s a Blur: A photography series that experiments with long exposures and motion blur. Every photo is a combination of movement mixed with a still subject. I’d like to think of each photo like a meditation: stillness in a sea of chaos.
These photos are also part of my Photo and 100 Words project. Since January 2014, I’ve been creating a new photo and writing about it every week. If you’re interested in finding out what prompted me to begin you can read the introduction over here.
(If you’re new to this photography series you might want to read how it all began in Part 1)
Is There a Plan B?
When I set out to photograph these flowers my initial ideas weren’t anything like the photos you’ll see below. I had visions of waterfalls and soft streams of water in my head, but the execution was not working. I bought a water filter for a fish tank as a way to recycle the water in my sink, but that’s as far as the good ideas got. I needed a way to spread the water out, and after building a strange-looking contraption made of plexi-glass, hot glue, and plastic straws, and then fiddling with it for far too long, I decided the waterfall idea might best be suited to photographing actual waterfalls.
I had two bouquets of flowers, a sink full of water, very little time, a bombed idea, and no inspiration. I wandered around my apartment, opening drawers of knick-knacks, and scanning my surroundings for other ideas. Eventually I ended up back in the kitchen, staring down into the sink. That’s when I realized I was staring natural water movement right in the face. All I had to do was unplug the drain and the water would swirl!
Love Spell
Want this hanging on your wall? Click the photo to buy now!
Making these photos was a bit like Casting a Spell.
The Setup
There were a few challenges I faced while making this batch of photos. The first was the covering up of the puke yellow drain in the center of my clean white sink. The bottom side of a white plate was an obvious choice, but it took a bit of tweaking to level it out so it didn’t wobble. A mix of folded up wads of paper towels, and a silly-putty-like substance I call blue goo, did the trick… eventually.
After all that, there was no way I was draining anything. Not only would it be wasteful, it would be far too time consuming, and I couldn’t risk clogging my sink with flower petals. My solution was a rubber spatula to carefully swirl the water around each flower. Even after all my attempts to steady the plate, the vase with the flower in it might still rock a bit if I mixed the water too hard. I had to be careful or risk getting blurry flowers along with my blurry background!

A behind the scenes look at the basic setup for these photos.
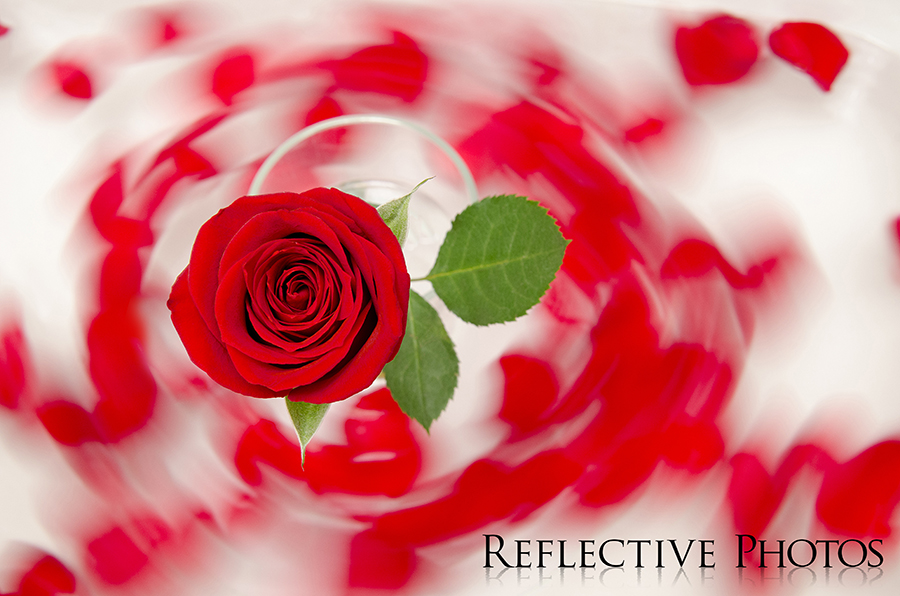
Ariel Rose
Want this hanging on your wall? Click the photo to buy now!
I get a little weird in this post about Desperation, I mean weirder than usual =).
Adding a Bit of Magic
The first photo I shot was lit very simply. Just a single hot light bounced off the white ceiling shown directly onto the sink scene. I love that first rose shot (Love Spell), don’t get me wrong, but it was just a little on the boring side, and it was time to make things interesting!
I pulled the petals out of the sink and threw in a little bling. I have these little styrofoam balls that are covered in sequins, and they’ve become a go-to background element I’ve used in many of my images. In this case, it was the fact that these babies float in water that attracted me to them in the first place, but the bling was certainly a nice bonus.
As usual, though, the images never really start off how I envision they will. I wasn’t getting any sparkle at first. It just looked like a slightly shimmery, white background – super boring. Even after I added a couple of flashes for some extra pop, it wasn’t turning out quite right. I added colored gels to the flashes and that’s when the magic started to happen. There’s just something about pink and purple that makes me happy, what can I say?
The last problem I dealt with was directing the flashes at the water’s surface without getting the funky color all over the flowers. I made a snoot out of aluminum foil to give the direction of my light more control with as little power loss as possible. It was still a continuous challenge to get the positioning of these lights right when I moved on to a new flower or composition. Sometimes I’d get a hot spot or splotchy color that didn’t spread across the entire frame. It took a lot of experimentation to get things just right, but that’s just an expected part of my process by now.
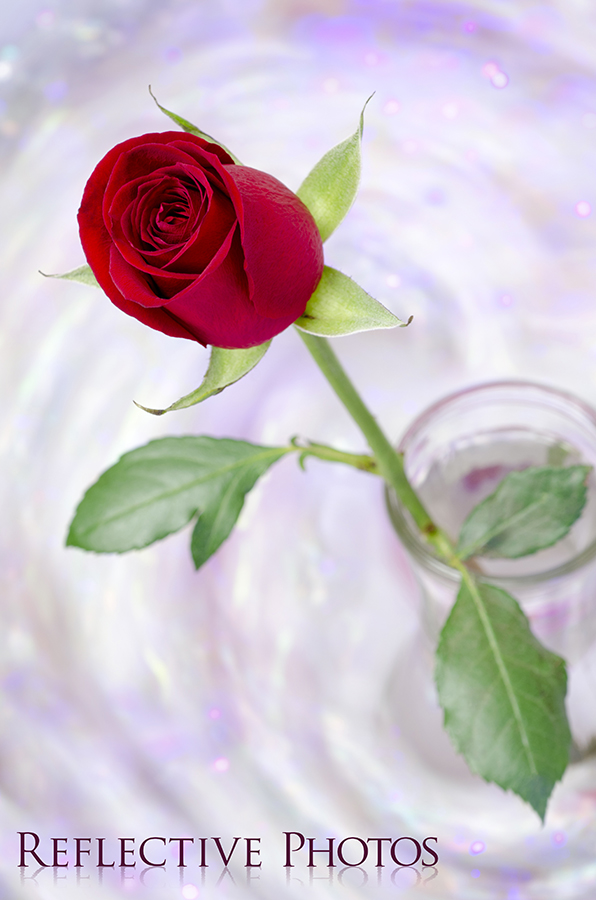
Glitter Rose
Want this hanging on your wall? Click the photo to buy now!
Meditating in a Tornado was the post I wrote when I figured out exactly what this series had to teach me.
Trading Order for Chaos
Once I started getting consistent results it was time to break out of the rut. I threw everything into the sink. Sparkly balls mixed with petals, petals from various flowers got thrown together, and I started to change up the movements too. Instead of swirling, I plunged the spatula from the surface to the bottom of the sink to create a bobbing motion on the surface. I had to move forcefully enough to create a few seconds of movement, but gently enough to avoid rocking the vase. There were quite a few blurry flowers.
It was during this controlled chaos stage that I think many of the best photos came out. I felt like the big bang and these were my galaxies! Magic.
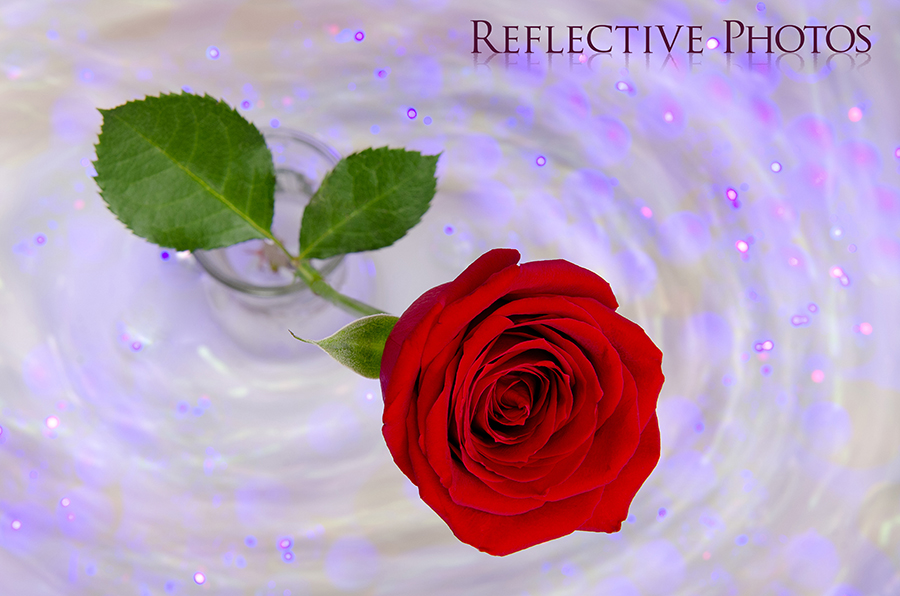
Rose to the Stars
Want this hanging on your wall? Click the photo to buy now!
Sparkling Sea in My Sink… sometimes you gotta think outside the sink.
Rose Galaxy
Want this hanging on your wall? Click the photo to buy now!
How do you see the world? How do you see yourself? It’s All About Perspective.
Red Roses in a Diamond Glaze
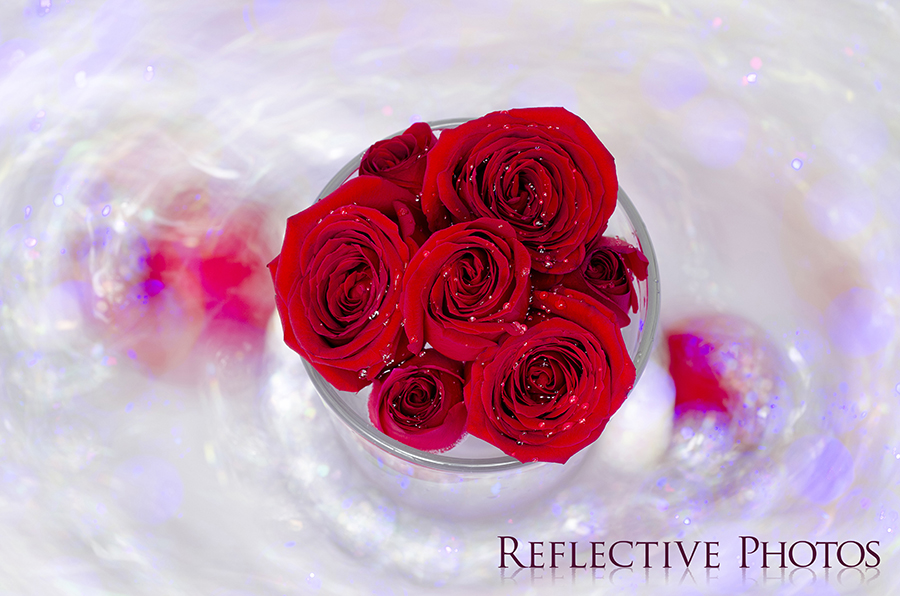
Want this hanging on your wall? Click the photo to buy now!
A story about yours truly, the Control Freak, and how I’m trying to let go.
Dew Splattered Rose

Want this hanging on your wall? Click the photo to buy now!
This photo got posted closest to my 1-year Blogiversary, so I did what all nerds do: I totaled up all kinds of nerdy numbers for the whole year of creating I completed. Woot!
Pink Daisy Cyclone
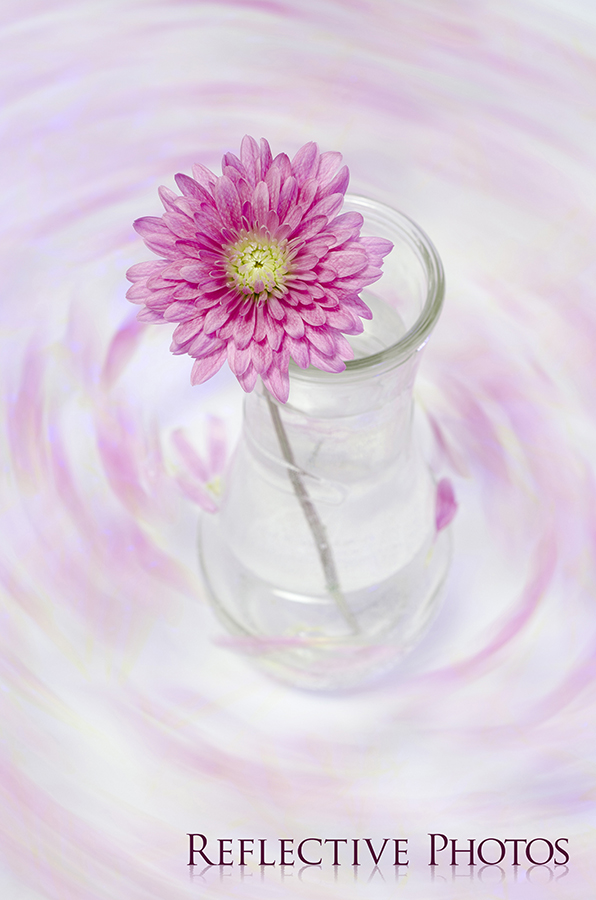
Want this hanging on your wall? Click the photo to buy now!
I get a little cynical in Down the Drain… it slips out of me sometimes, can’t help it.
Pink Pom Twister
Want this hanging on your wall? Click the photo to buy now!
How I Embraced the Chaos, a story about meditation.
Pink Pom on Fire
Want this hanging on your wall? Click the photo to buy now!
I admit it… I’m a whore… a Passion Whore.
Daisy Tie Dye
Want this hanging on your wall? Click the photo to buy now!
Painting with Motion is a story about a moment that gave me a little boost of artistic confidence.
Fire Flower Flow
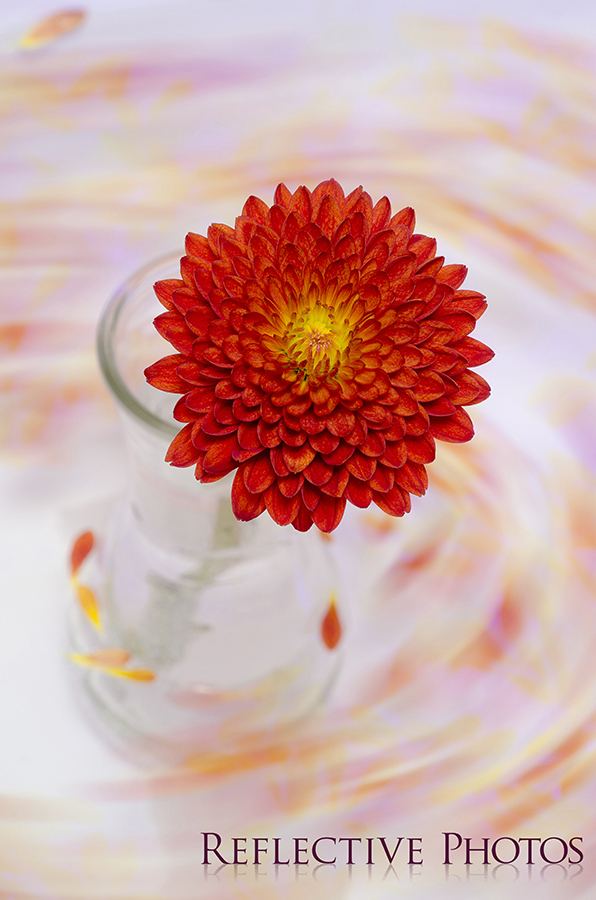
Want this hanging on your wall? Click the photo to buy now!
What would you think if I told you that photography is a mixed media? That was the point of Unveiling Photography’s Hidden Layers.
What’s next?
If you get my newsletter, you already know that a batch of super close up snowflake photos came next. Just like the windswept leaf photos I showed you in Part 2, the snowflakes are inserted into a real snow scene that I blurred in the camera. I’ll show you the scenes behind the art in Part 4 in a few weeks! If you sign up below I’ll make sure you don’t miss it! (Plus you’ll get the chance to win my art EVERY MONTH and a digital download of my artsy fartsy calendar… how can you say no to an artsy fartsy calendar?)
Update: Part 4 is now available, so now you can learn how to photograph snowflakes and get a glimpse of the snow scenes I used to create abstract, windswept backgrounds.
May 22, 2015 |
Want this hanging on your wall? Click the photo to buy now!
I remember the exact moment when I discovered the creative flower photographer in me.
I had just gotten back from my annual ohmygoditsspringletsgoforawalk tradition with overflowing handfuls of periwinkles. This was also the first time I brought the flowers to the camera, probably to spare Nick from the inevitable lag time of dating a photographer.
I had had my “strobist” lighting kit (recommended by David Hobby) for awhile by then, but I had never experimented with the color effects gels in the kit. Since I was working with white tulle for my background, I decided to try it. I chose a hot pink gel to tint my flash and, when the image popped up, I oooohhhed and aaaahhhed like the audience of a magic show. I couldn’t believe that the photo I was looking at was mine!
I’ve never been a huge fan of green, but it’s only since that day I began to avoid the ubiquitous green background, ever-present in traditional nature photography, altogether. It’s the flowers that intrigue me, not the grass they grow in!
Could you imagine how these cute green flowers would drown in a sea of grass? A purple sky is much more fitting!
What are these numbered posts all about? Read the introduction to my Photo & 100 Words project and find out!
