About Life’s a Blur: A photography series that experiments with long exposures and motion blur. Every photo is a combination of movement mixed with a still subject. I’d like to think of each photo like a meditation: stillness in a sea of chaos.
These photos are also part of my Photo and 100 Words project. Since January 2014, I’ve been creating a new photo and writing about it every week. If you’re interested in finding out what prompted me to begin you can read the introduction over here.
How it Began
The evolution of this series has been interesting. The title and the technique came to me first. In the beginning, though, I was being too specific. I had this idea to express the chaos I felt surrounding certain concepts, like time and love.
The ideas for the first two photos came to me while I was brainstorming, and I sketched them out on a couple of Post-Its. I was happy with what I made, everything came out almost exactly as I imagined it would, but the thought of creating more photos with cliche symbols didn’t settle with me. It felt too much like I was forcing it.
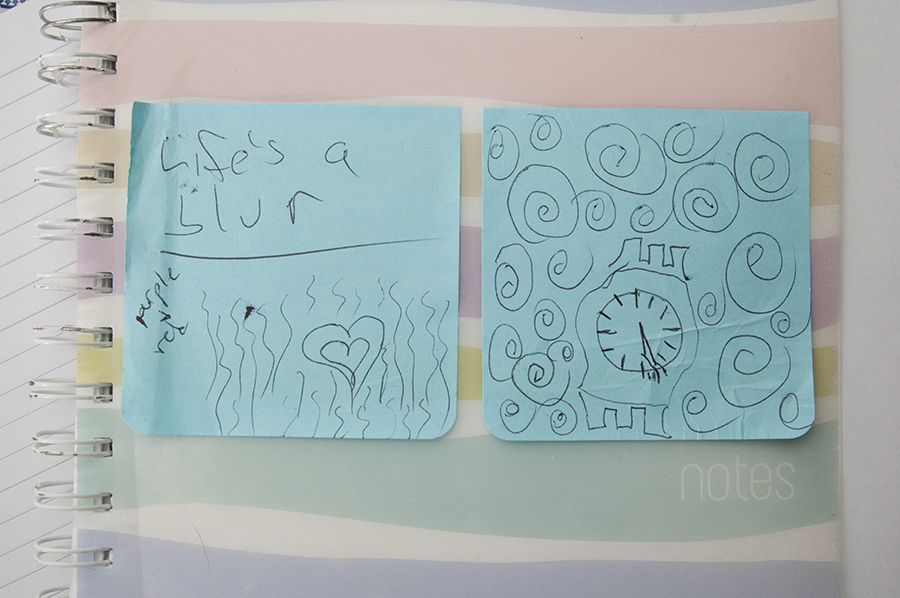
My Post-It note sketch when I thought of the idea for this series.
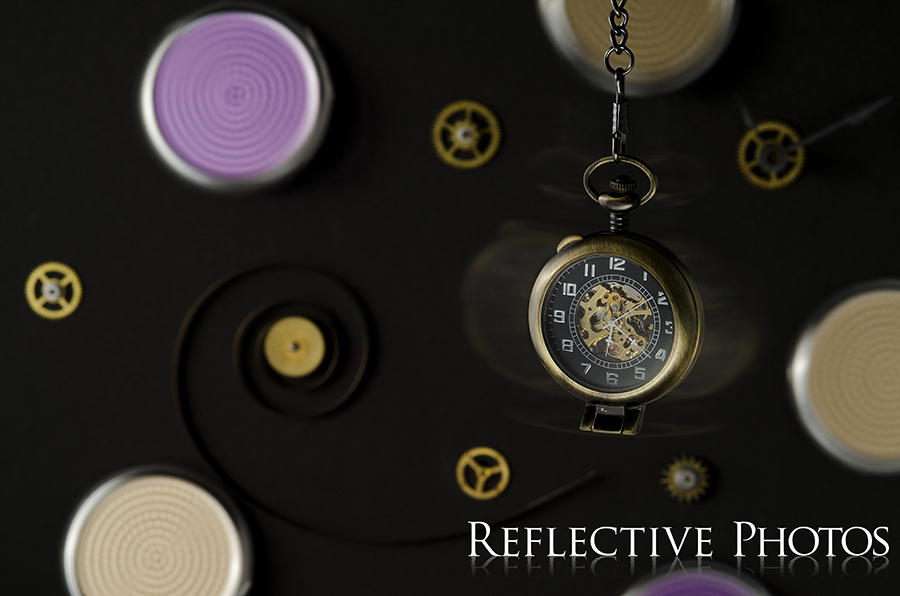
This first photo, “The Pocket Watch Between Tick and Tock,” is composed of 7 different shots I merged together. I’m pretty sure this is the number one most time consuming piece of art I made all year. When this piece was first published, I wrote an acrostic poem to go with it. I called it “Desperately Seeking Time.”
The Pocket Watch Between Tick and Tock
Want this hanging on your wall? Click the photo to buy now!
If you think it’s a creative process to come up with ideas, it’s nothing compared to the creative process of making the set work for you.
I used a mixture of books, a 2 1/2 gallon jug of water, and a paper towel holder with a brick on top, to hang the pocket watch at the exact height I wanted. I know there are more professional tools that would have worked, like a C-Stand, but this tog just doesn’t have the room for too much studio equipment at the moment. So I improvise, and it works!
The pocket watch and all the little watch and clock parts came from my dad, who has been obsessed with building steampunk lamps lately, and has an awesome collection of stuff I can borrow.
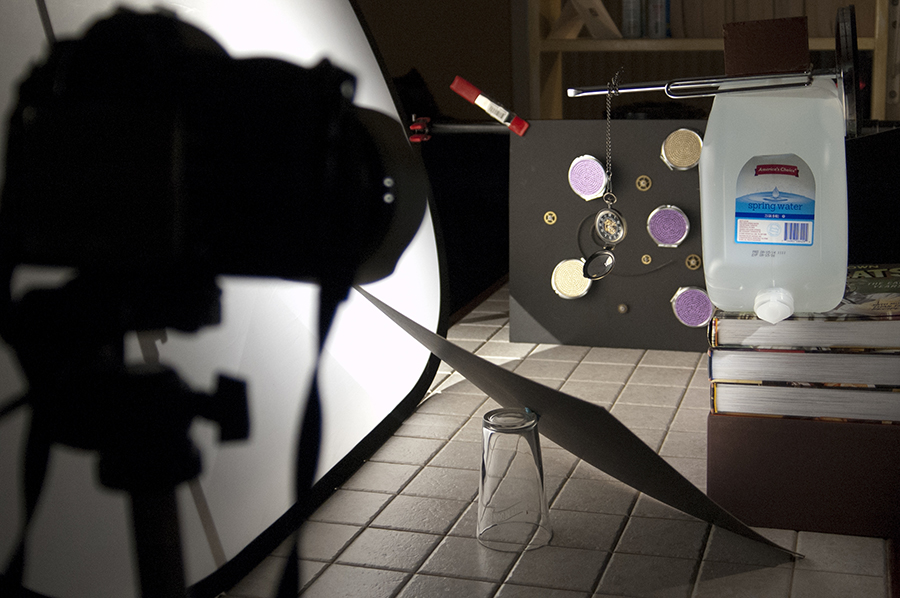
Behind the scenes of “The Pocket Watch Between Tick and Tock.”
The swirling discs in the background are actually makeup mirrors I found at Michael’s. I hot glued wooden skewers to the backside, and slipped straws over them. These were pushed into holes in my background board so I could spin them smoothly from the backside.
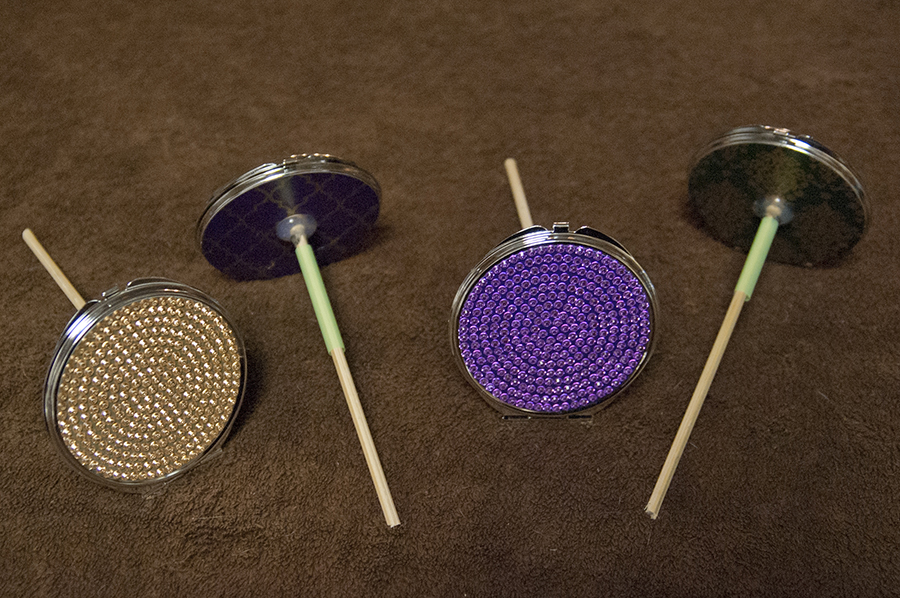
A look at how I made my props movable on the set.
A Sudden Realization
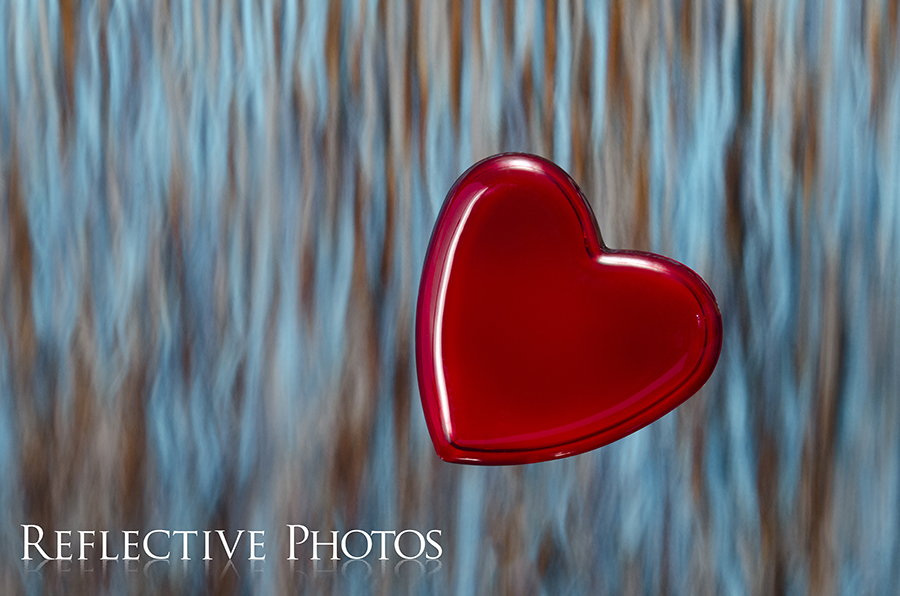
After creating “Steady Heart” I discovered what this series was really about. I have to admit something to you first, though, the background I was going for didn’t appear. I expected chaos; what I got was tranquility. It wasn’t what I wanted, but I fell in love with it. Sometimes you just gotta go with the flow… and the flow of that background swept me away from my original idea.
I was stunned that all the chaotic movements that made this photo appeared so peaceful. (you can read the story behind the photo here) That’s when I realized that this series was about meditation. Each background is like an awareness of the chaotic world and the subject is at peace there.
Steady Heart
Want this hanging on your wall? Click the photo to buy now!
This a-clamp contraption was another creative process, and it wasn’t at all as steady as my title might lead you to believe. The heart is a glass coaster, and its weight made it difficult to balance and prop up. Even looking at this photo as a reference, I don’t think I could do this again, at least not easily!
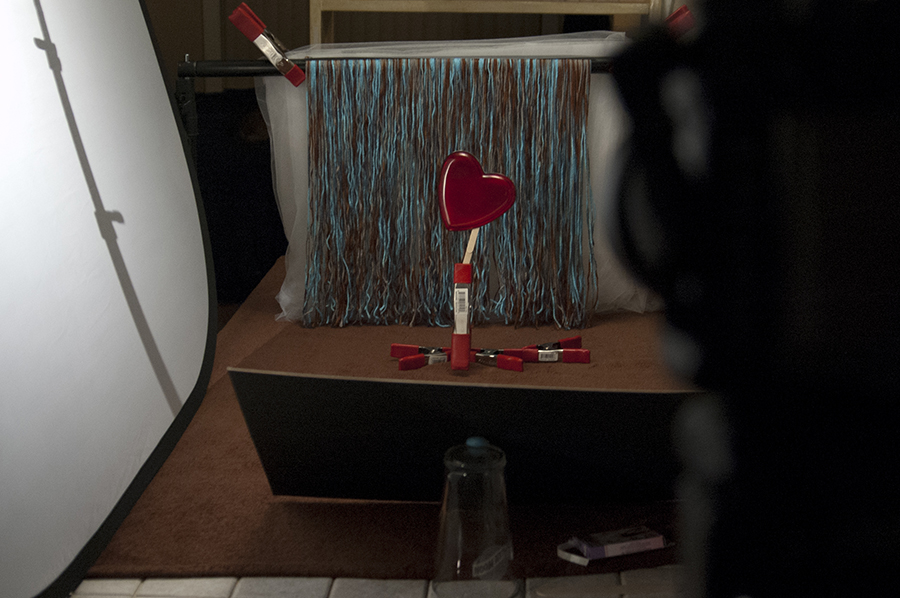
A look behind the scenes of “Steady Heart.”
I had to put together another hot glue job to make my props work for me. The red glass was transparent, and I didn’t want the background to show through. To make it opaque, I traced it onto a paper plate, and cut out the shape to be used on the back side of the heart. I added some popsicle sticks and stuck the whole contraption together with double stick tape.
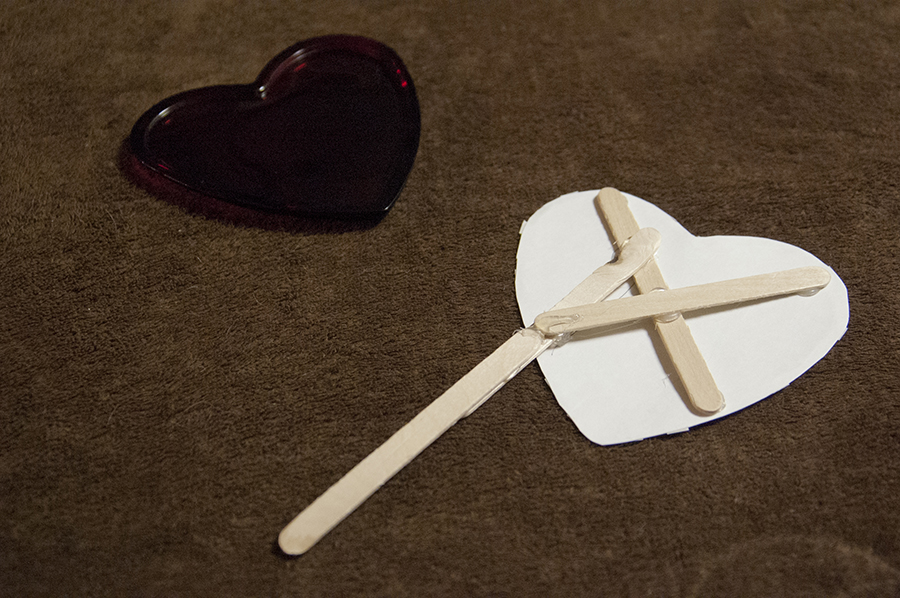
A look at another prop hack I came up with.
So that’s all the behind the scenes content I have for you in this post, but there’s more info about how I created the next set of photos in this series in Part 2. If you want to be sure to see my next post, make sure you sign up below. I send out emails only 1x per week; you’ll get my stories and links to other blog posts like this. Don’t miss out!
If you have any questions about what I did here, feel free to ask in the comments below. I’m very open about every aspect of my photography process.

This glimpse behind the scenes is fascinating! I love seeing how your simple props transform into something so much more when photographed artfully with beautiful lighting. Rather like a magician’s sleight of hand, or the magic that happens when the amazing scenery in a stage play looks so real, but then up close you see it is all just painted trompe l’oeil. You must have a very good eye and keen imagination to see the potential in all those bits and bobs!
Thank you Dorothy. I do often think of photography as being a magical art so it’s awesome to hear you describe it this way.
I always love reading your thoughtful comments =) Thanks so much for reading XOXO