About Life’s a Blur: A photography series that experiments with long exposures and motion blur. Every photo is a combination of movement mixed with a still subject. I’d like to think of each photo like a meditation: stillness in a sea of chaos.
These photos are also part of my Photo and 100 Words project. Since January 2014, I’ve been creating a new photo and writing about it every week. If you’re interested in finding out what prompted me to begin you can read the introduction over here.
(If you’re new to this photography series you might want to read how it all began in Part 1)
Why Snowflakes?
I really didn’t know what I was getting into when I decided that snowflakes were the subject I’d be approaching. The truth is, snowflakes were the only subject I could think of that would be flying across a winter scene, so I was determined to make it work.
It took me 2 snowfalls to get anything at all, and it wasn’t until my 3rd attempt that I actually got the images that were used in this series. It was not easy, and it certainly tried my patience… but it was worth it. I learned a lot and, in the end, I was really happy with my results!
How to Photograph Snowflakes
Patience and persistence… that’s the real answer, but if you’re really going to attempt to capture some snowflakes this winter, maybe I can help you to avoid some of the mistakes I made!
You’ll Need:
- Camera with macro lens – but you already knew that right?
- Clean, cold, and dry surface – I recommend plexiglass in order to backlight with an LED light, but for a simpler setup a piece of black fabric will give you the best contrast in natural light.
- Towel or paper towels – to wipe your surface clean so you can catch more fresh flakes.
- Toothpick – you don’t want to use even gloved hands to try and move snowflakes, they might break or melt.
- Index Cards – or something similar to transport the snowflakes
- Tripod
- A cooler (optional and only if you want to replicate my setup)
- LED light or other continuous light source (optional)
- Colored Gels (optional)
My Setup

The photo above is a recreation of what I set up last winter so that I can show you the general idea. I guess my brain was frozen when I shot these, because I totally forgot to take photos before I broke down my set and took my numb ass inside. Whoops!
I used a cooler because it was the perfect size to support the small piece of plexiglass I wanted to use. The white interior gave me some extra light too.
I was using an LED ring light that has the option to put out continuous light. I covered half of the light with a blue gel and the other half with a magenta gel.
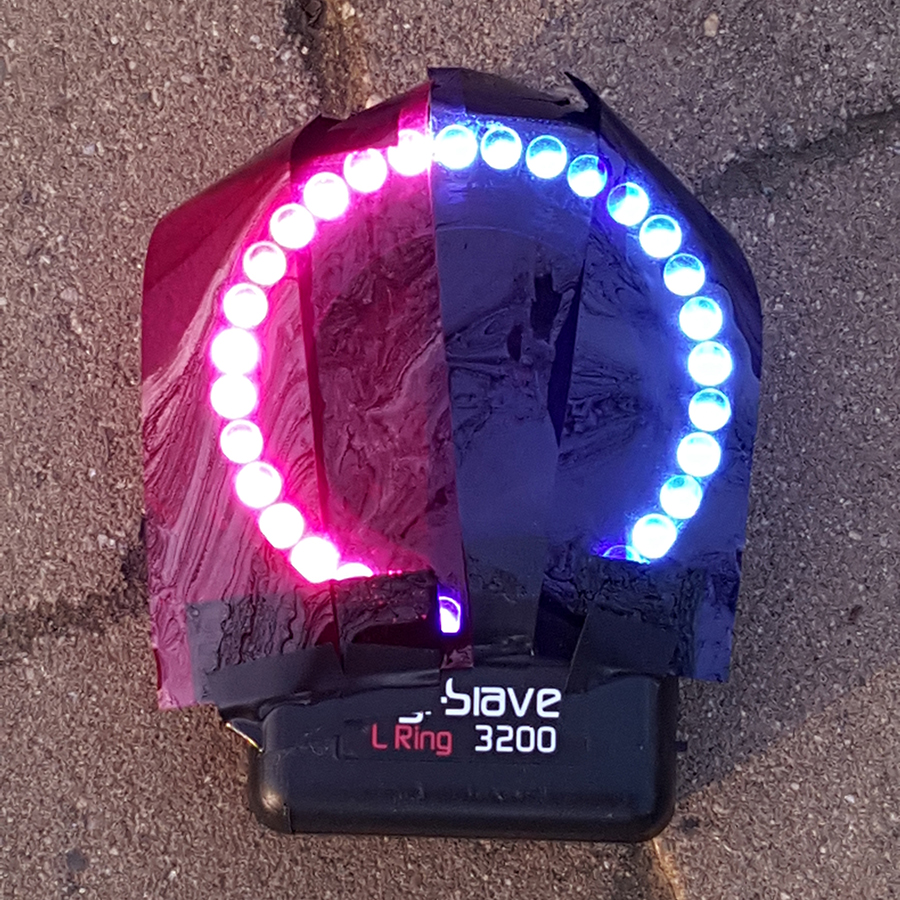
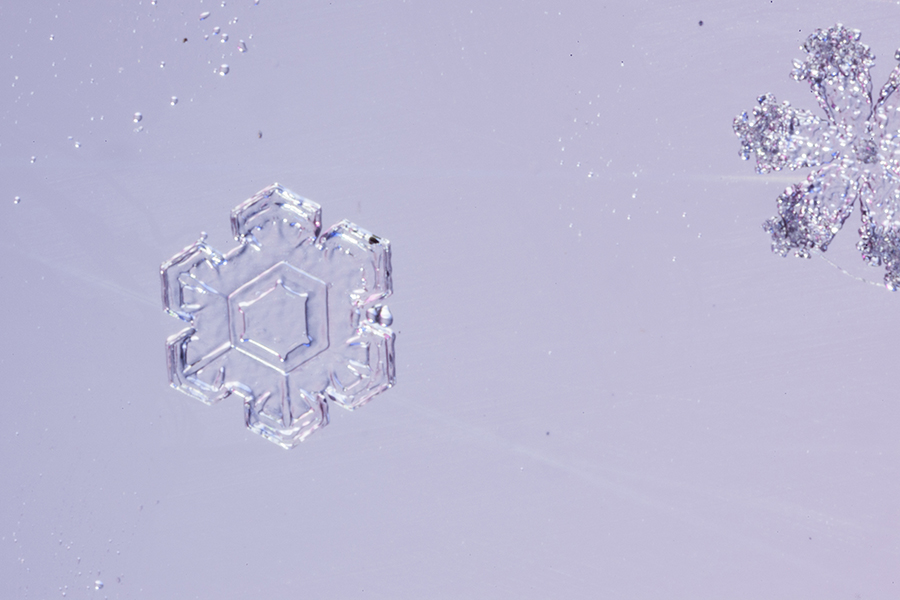
I really loved the effect of the colored light, but I ended up altering the color later on because it didn’t fit right into my snowy scenes. Here is one of my snowflake captures before I processed it and removed the background.
Here are a few tips you might want to consider before you make an attempt at snowflake photography:
Tip #1 Get prepared now!
Even if there’s no snow in your forecast, you never know when the first flurries might start to appear, and if you wait until then, you’ll probably be too late.
You want to put all of your materials outside right now, preferably under cover. (All except your camera and lens, of course.) You have to remember that snowflakes are delicate and your materials will melt them if they haven’t had enough time to chill down from indoor temperatures.
Tip #2 Fresh snow is the only good snow
You really have to catch the snowflakes as soon as they fall out of the sky. You can’t use the snow on the ground because the crystals will clump together and all you’ll get are chunks of ice that aren’t too attractive.
Sometimes, even the fresh snow is ugly! Not all snowflakes have those beautiful six-sided designs you’re thinking of. I got only 1 recognizable snowflake after three hours of snowfall the first night I tried.
Tip #3 Get under cover
It may seem obvious, but you will want some protection from the elements. You don’t want fresh snow falling on top of the snow you’re trying to photograph, and you don’t want the wind blowing your snowflakes away. Plan ahead for a space that will protect your set without melting your snowflakes. A covered porch, a shed, a garage, a tent, or even the back of your car could work.
Tip #4 Move your snowflakes, not your camera
At first my set was completely different. I had a bigger piece of plexi, propped up at a 45 degree angle so that I could easily move my camera to the snowflakes without moving them. I don’t know why I thought this would be easier, or if I even thought, haha, but turns out moving the snowflakes is waaaaaaay easier.
Just make sure you have a toothpick and a few index cards pre-chilled so you don’t melt the flakes. Eventually I used another piece of plexi to collect and search for good snowflakes, and simply pushed them onto an index card and carefully transported, and slid them in front of the lens. Practice with a few damaged snowflakes before you go for the precious good ones.
Tip #5 Work at night
If the sun is your light, then obviously you can’t take this tip. Personally, I like to have full control over my light, so my setup photo is a little misleading because every one of these snowflakes was captured at night using only the one ring light. This brings me to…
Tip #6 Backlight your snowflakes… or don’t…
I personally found that shinning light through the snowflakes instead of at them brought out more detail and gave them a more translucent look. If you want a more opaque look that might not be for you. I suggest you experiment with your light to find a look you love.
Next time I do this I will probably use two lights… the possibilities are endless, play with them!
Please Note: I learned about snowflake photography from the genius behind snowcrystals.com – last time I went to share this website with a friend, however, I found that all of the content regarding snowflake photography was gone. I’m guessing this is probably because his new book includes all of his amazing tips… I feel lucky to have come across the info before he deleted it! Kenneth Libbrecht’s snowflake photos are far superior to mine, though, and if you want more detailed information on this topic I’m sure you can find it in his new book, The Snowflake, Winter’s Frozen Artistry… but even if you don’t want to buy it, you’ll certainly be able to see some gorgeous snowflake photography over there, so check it out anyway!
Blurred Scenery
As I’m sure you’ve guessed, the background images were shot separately from the snowflake images. Unlike my fall leaf photos, earlier in this series, the snowflakes didn’t come from the same snowy scenes I photographed. Unfortunately, this just wasn’t possible, especially because my favorite backgrounds were created on sunny days without a snowflake in sight. Finally, I’ve discovered a photography technique that thrives in sunny, mid-day light!
Here are all of my final winter scenes followed by a snapshot of the original scene. Keep in mind that all blurring was done in camera and no Photoshop was used to blur these backgrounds. If you want the details of exactly how I created the background images, you can get the nerdy photo details in part 2.
I also added links to the original story each photo was published with, just in case you’re interested in getting more!
Crystalline to Crusty
This photo is for sale… click on it for more details.
Obviously, you can see that this snowflake isn’t exactly perfect… you can read about this OCD lady’s battle with accepting imperfection in Seeking Perfection.

A snapshot of the background scene before I blurred it in camera to create “Crystalline to Crusty.”
Beachy Snowfall Scenery
This photo is for sale… click on it for more details.
I guess I just can’t keep my mind from seeing summer, even in a snowflake! Come on, you know that looks like a sand dollar… but no it actually is a snowflake, and that background actually is a snowy scene, see? Life’s a Beach was the original writing that went with this photo.
A snapshot of the background scene before I blurred it in camera to create “Life’s a Beach.”
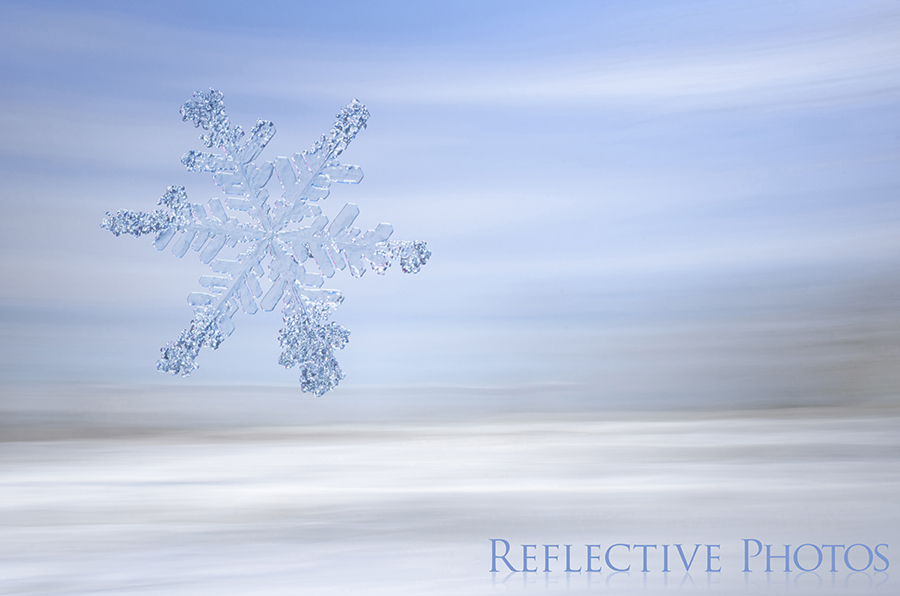
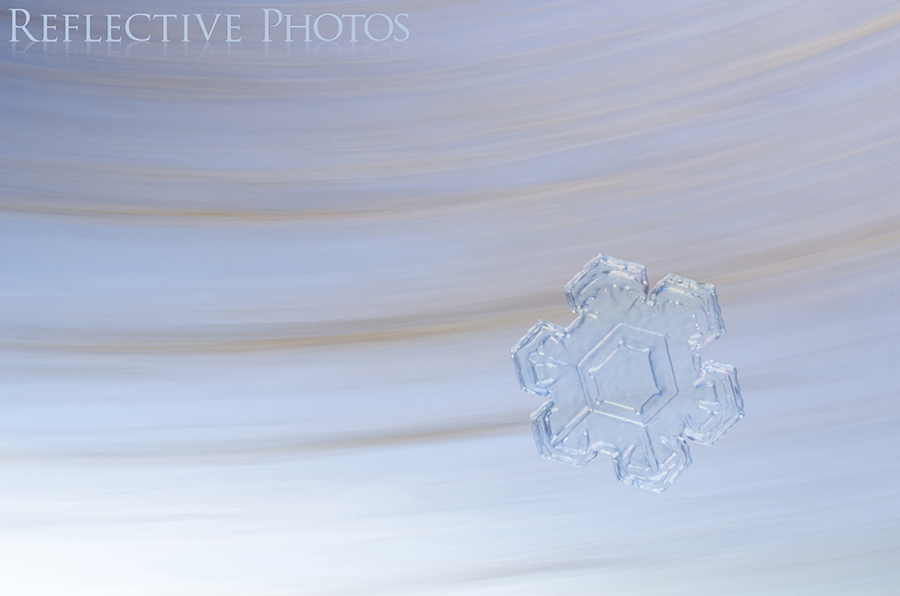
Breezy Snowfall
This photo is for sale… click on it for more details.
As I compared all of my finished photos, I noticed that they all had one thing in common, and it has to do with my favorite number, Six.
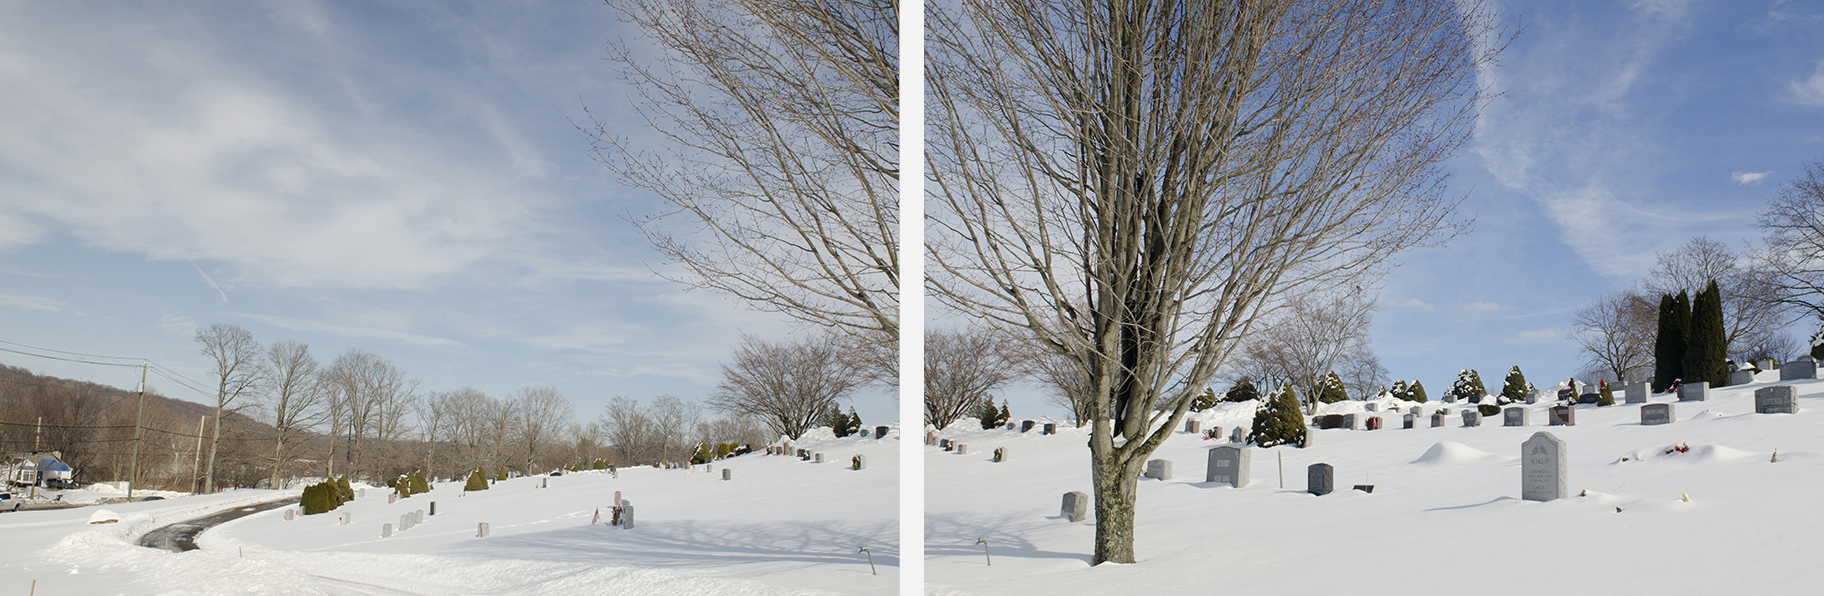
A snapshot of the background scene before I blurred it in camera to create “Breezy Snowfall.”
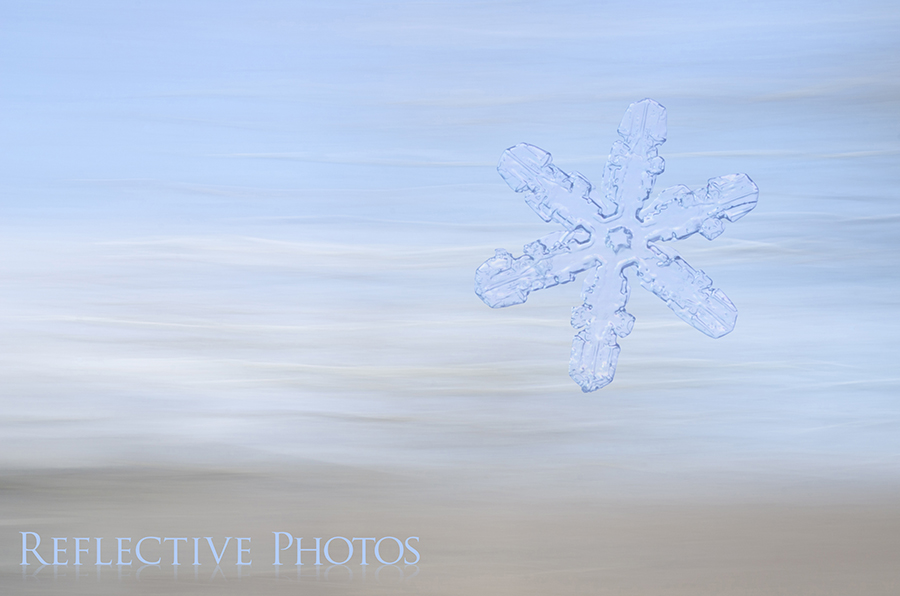
Swept Away Snowflake
This photo is for sale… click on it for more details.
I think I somehow ended up making a feminist statement with Girls Who Cry Snowflakes. I got a little personal too…

A snapshot of the background scene before I blurred it in camera to create “Swept Away Snowflake.”
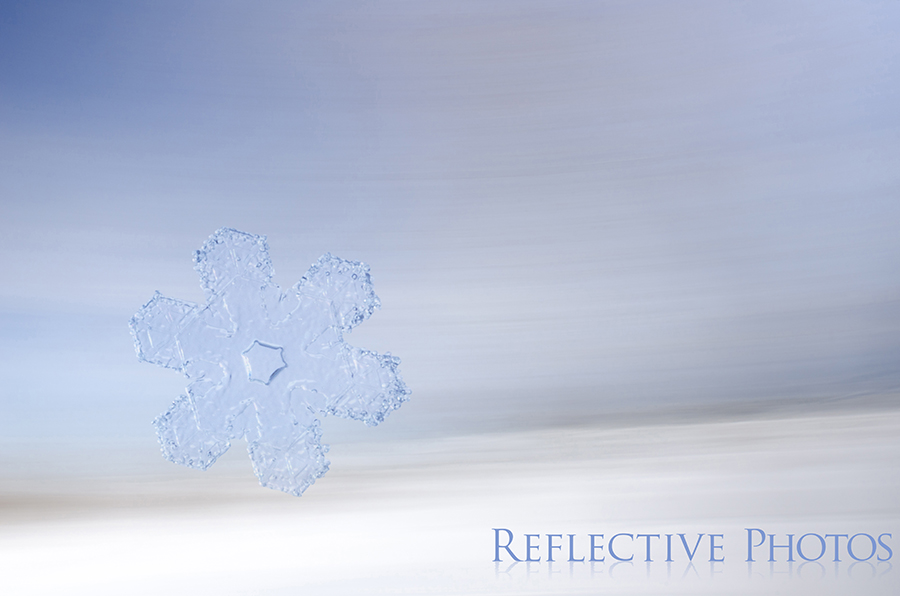
Hexagon Crystal
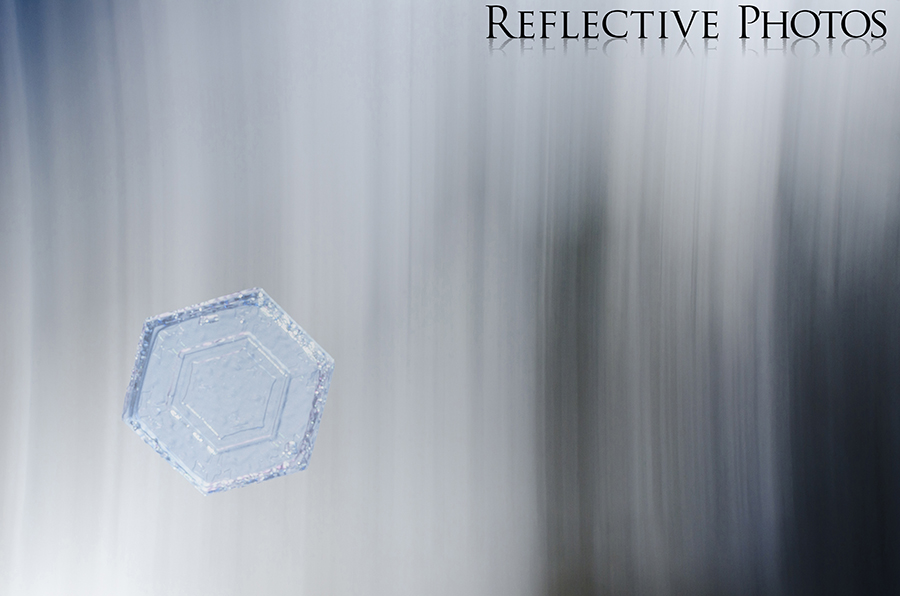
This photo is for sale… click on it for more details.
In Simplicity I wrote about the difference in achieving minimalism in photography and in writing… they are actually total opposites when it comes to approach, at least my approach.

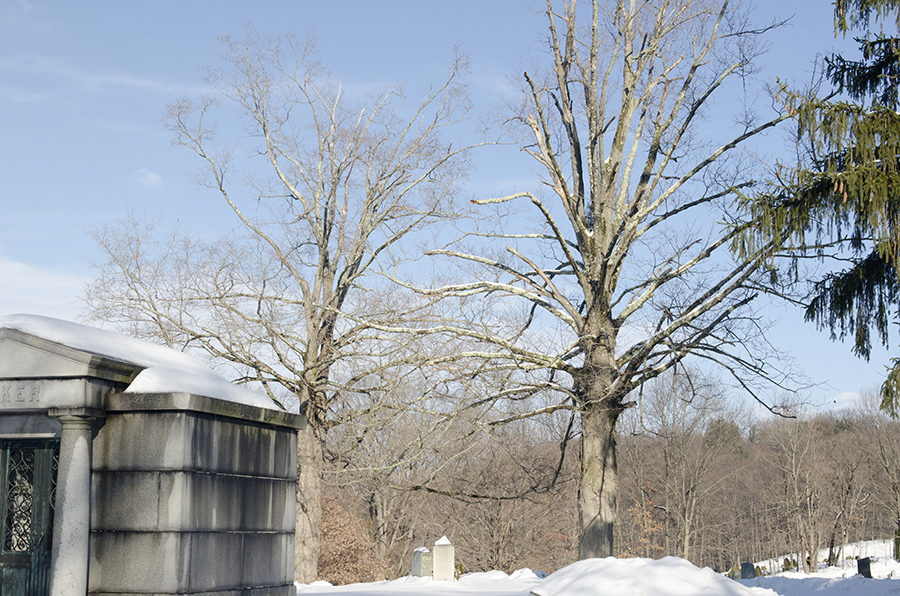
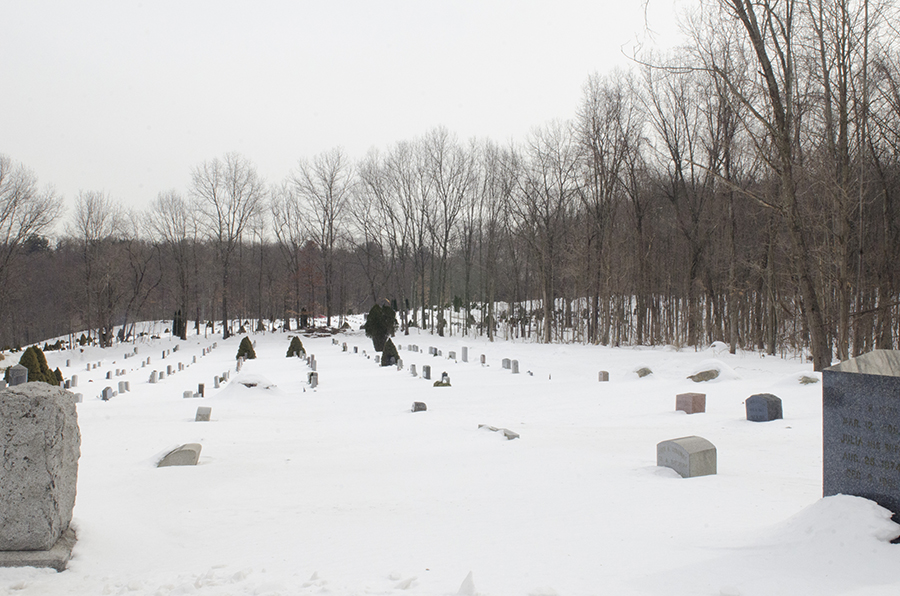
A snapshot of the background scene before I blurred it in camera to create “Hexagon Crystal” and “Icy Flames.”
Note: This image is the scene I used for both “Hexagon Crystal” and “Icy Flames” – I simply spent more time on the trees in the darker version and more time on the sky in the lighter version. I may have also reversed the direction that I blurred the image (from top to bottom and vice versa), but I’m not completely sure, my memory is shaky on that.
As I’m sure you can see I also added a blue tint by favoring the cold side of the white balance bar in my post processing. I did this to all of the images I shot on overcast days because everything was just so bleak and gray. I’ve come to find that the best days to do these blurred scenes are on sunny days with a few scattered clouds. These conditions make for the best contrast, which is ideal for visible blur lines.
Icy Flames
This photo is for sale… click on it for more details.
Persistence pays off was me whining about all the hard work it took to get my first snowflake, like I said, it wasn’t easy… but you can check out what the original image looked like on my 1st ever snowflake!
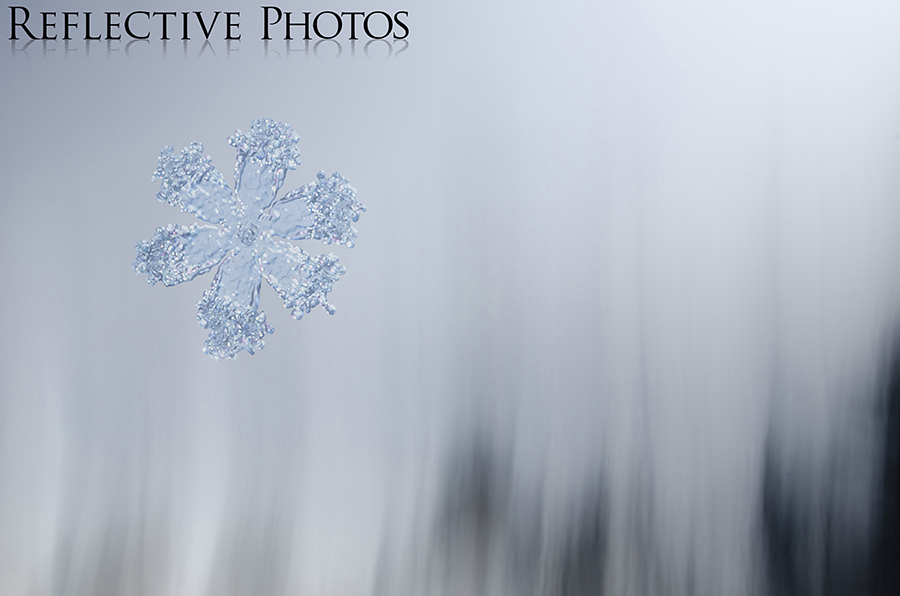
A Fine Flurry

This photo is for sale… click on it for more details.
A Glimmer of Hope is me trying to be positive when everything else seems to want me to go the other way.
A snapshot of the background scene before I blurred it in camera to create “A Fine Flurry.”
Once again, make sure you check out part 2 if you want the details on how to create abstract scenes with motion blur.
What’s Next?
In the next blog post I’ll be showing you how I made surreal rain for the colorful background of my latest flower photos… any idea what I used? This post is coming soon, if you don’t want to miss out, make sure you sign up below to be notified!
Happy shooting!
Update: Part 5 is now posted, find out how to create surreal rain for the backgrounds of your images.

Well, that was fascinating! Your photos of snowflakes look so easy and effortless, (and I mean this as a compliment) but the back story gives some true perspective on it. For instance, don’t ask me why I would think you were running around trying to snap photos of snowflakes in mid-air! But that’s the impression the photos give. The fact that you had to capture snowflakes and even transfer them to another surface!!! Wow!
Aww, that makes me so happy! I’m glad that they look effortless, and I truly wish I could just point my camera at the falling snow, that does sound like fun. Those impressions you got are exactly what I was going for and so all the work has certainly proven to be worth the effort!
Loved this! Thank you for sharing!!!
Yay! It was my pleasure!