Mar 8, 2017 |
About Reflections: Every photo is a frozen memory. BUT every memory is also a reflection. AND every reflection is a distortion of the truth based on perspective. This series explores literal and figurative reflections.
Nick and I were on a roller coaster road trip at the end of last summer, and our Virginia hotel was right next to this massive warehouse full of home décor. I’d never heard of it before, but apparently At Home is a chain that hasn’t made it up to my neck of the U.S. just yet. =(
I can’t tell you how long I wandered, or the amount of restraint I had to have to not buy everything in the store! It was difficult to leave, but eventually I narrowed down the things in my cart to only a few small reflective props, and only two impulse buys that strategically lured me in at the checkout aisle.

All of the photos below, and many more to follow in future posts, were made reflecting these objects off of one another.
If you’ve been following along behind the scenes, you may have noticed that I’d been using my little flashes up until this point. I swear by these little lights for my macro photography, and I love how portable and simple to use they are… but they have 2 downfalls:
1) They’re battery operated, so as the batteries start losing power it takes the flash longer and longer to recharge for the next burst of light. No big deal when you subject isn’t moving, but…
2) They also don’t have modeling lights. So that makes it really hard to see what you’re doing, especially when the subject is reflections. The slightest movement can totally alter your image and it can be hard to get the light back to where you started if you move it by mistake.
For those of you who are new to strobe lighting, modeling lights are the lights that give you a preview of where the light is actually falling onto your subject. They’re not as powerful as the full force flash that goes off when you hit the shutter, but they allow you to see where the highlights and shadows will fall before you take the photo. With flashes you have to guess and check.

The solution?
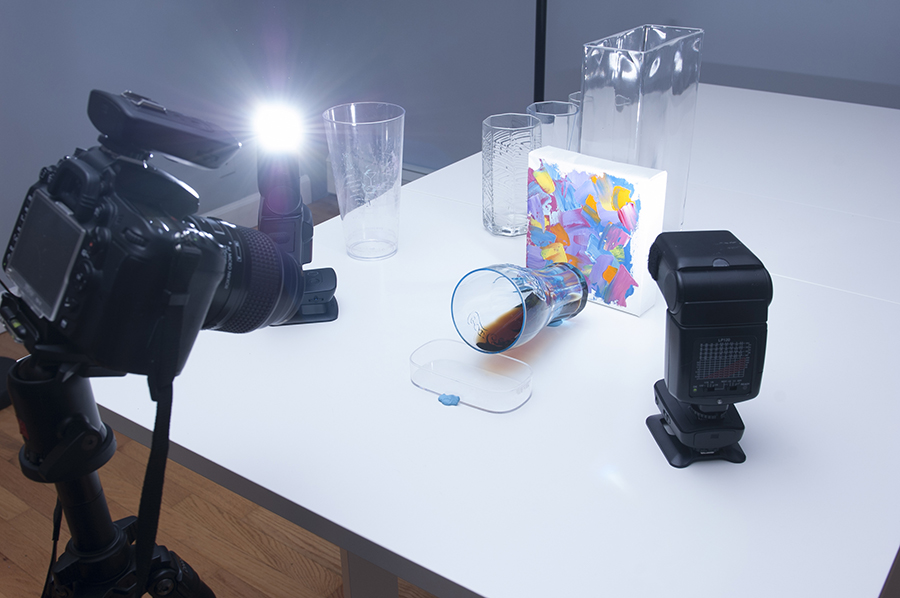
I borrowed some lights; Dynalites to be exact. I only used one light and then, for this particular photo, I clamped a “McClamp” to my table and then attached a small, 12-inch diffuser to the other end to soften the light. The black card on the table cut back on the amount of extra light that was bouncing off of the white surface.
However boring it is to photograph products, my product photography experience taught me that black and white cards are very useful tools for modifying light. I’m using matte board that’s white on one side and black on the other because it’s what I had on hand, but you could use foamcore, posterboard, and even construction paper.
Here’s a closer look at the set so you can see a bit more detail.

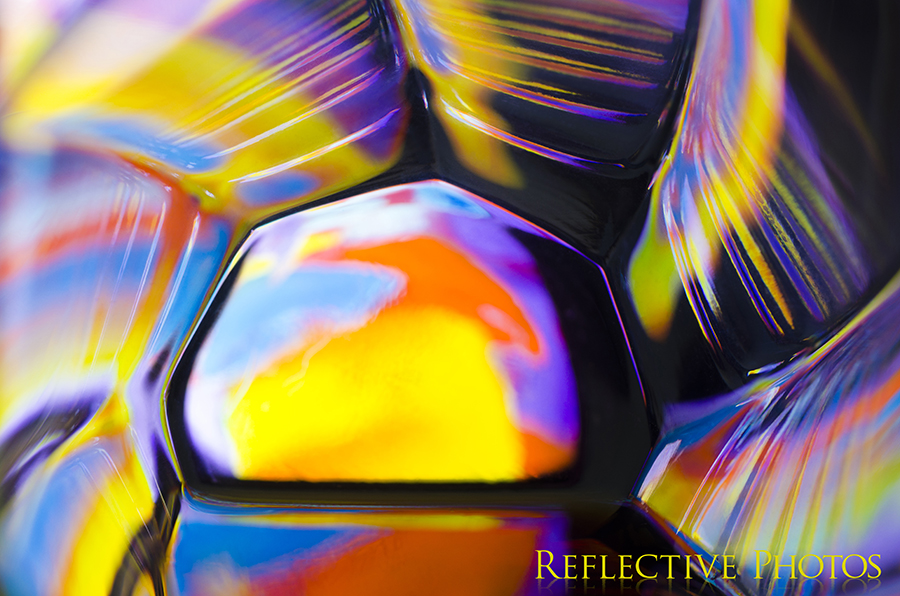
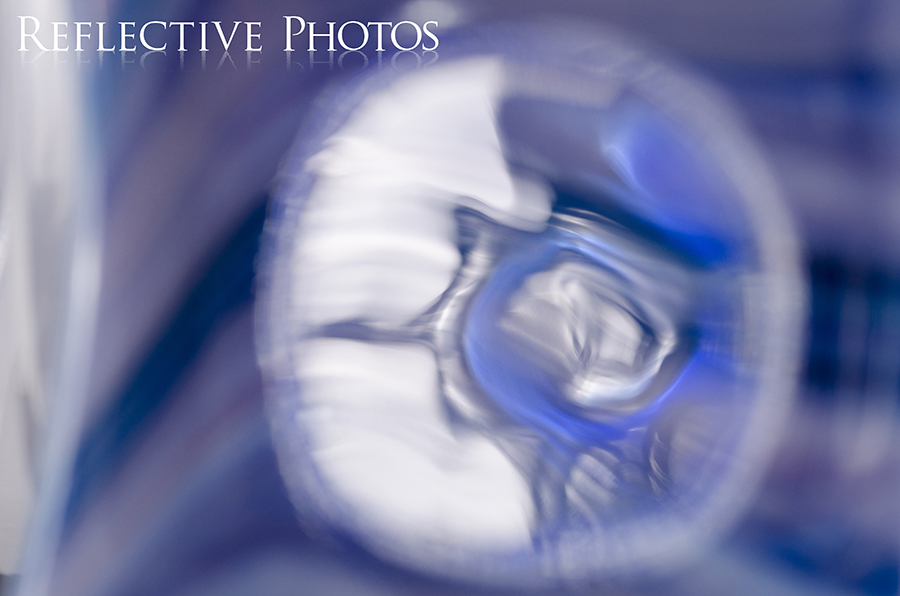
You can see what I got out of this setup below! The light is filtering through that mosaic candle holder and backlighting each little piece of glass. My camera is catching only a bit of the candle holder on the left, and is mostly focused on the reflection that’s bouncing off of the bottle.
You might notice that the surfaces of both objects are all a blur, and only the reflections are sharp. I find the literal and figurative depth of reflections so fascinating!

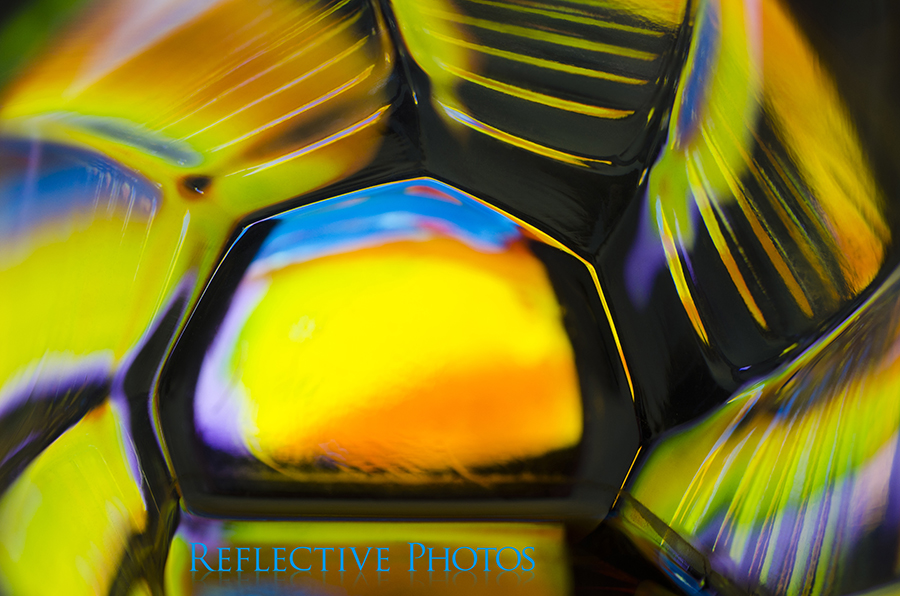
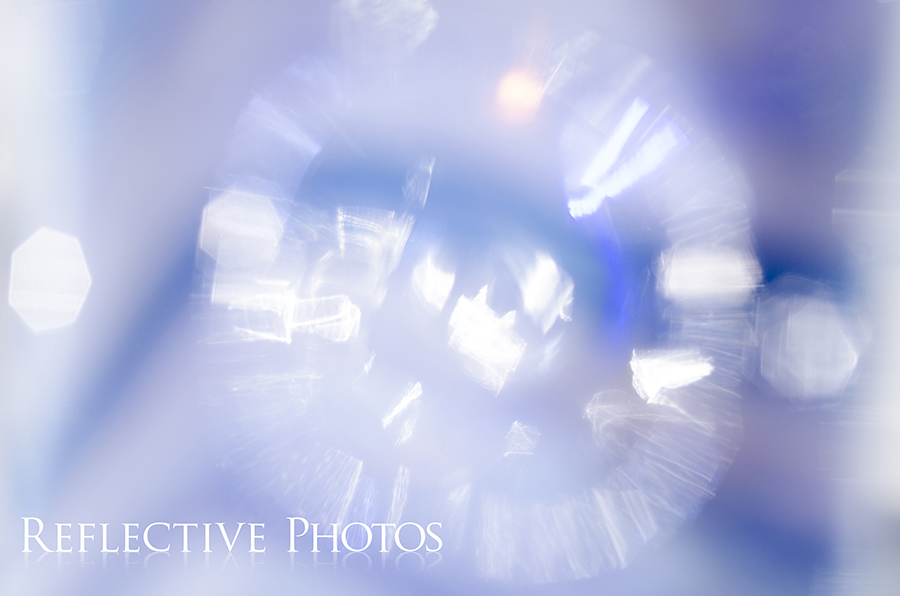
The same lighting and concept were used in the above detail shot, I just switched out the bottle for a soap dish.
I think I must have tried the larger dish at first, but I probably didn’t like the results and stuck the smaller one on top. So the result below is zoomed in on that smaller dish, the surrounding areas aren’t captured in the frame.
Woah… I covered a lot here. In all honesty, I planned on showing you more in this post, but I think that’s enough for today.
Next time, I’ll show you how one simple adjustment of this one light can create extraordinary results! Stay tuned for Part 4 =)
As always questions and comments are welcome below.
Feb 15, 2017
About Reflections: Every photo is a frozen memory. BUT every memory is also a reflection. AND every reflection is a distortion of the truth based on perspective. This series explores literal and figurative reflections.
In the first behind the scenes post on this series, you probably noticed there were barely any literal reflections. I let myself create anyway, and relied on the written reflection, which has become such an important part of my work, to squeeze the images into this series. Once I got started with literal reflections, though, it was kind of hard to stop!
Turning Art into Art!
An online course in palette knife painting led me to create the colorful abstract painting pictured below. It was only meant as a practice canvas, but I liked the way it turned out and decided to keep it. I thought it would be interesting to see what kinds of reflections I could make with it.
Inspiration in the Bottom of a Glass
The reflection surface was inspired by wine! As I was sipping on my pinot noir one night, I noticed how much I loved the reflection of the bottom of the glass into the dark smooth liquid. I wouldn’t dare waste wine, though! So I used coffee instead.
I played with my wine glass a little, but the reflections were kind of boring with its smooth sides. I rummaged through my cabinets to find an assortment of randomly shaped glasses that my landlords had left behind. Jackpot!
As you can see in the above photo I was trying to light the canvas… and it was just not working for me. I couldn’t light the canvas without throwing unappealing highlights onto the glass and coffee.

The Solution?
I took close up photos of my canvas with my phone and used the backlighted images of my art to create the reflection. Then I only had to use one flash, bouncing off the ceiling, to brighten up the areas surrounding the coffee puddle.
I loved the resulting photos so much that I made a bunch of variations by rotating my phone and zooming in on my favorite parts of the image. Here are my favorite picks!
More Techie Details
The other secret behind this set of photos was that each one of these was actually 5 or 6 images all merged together in a focus stack. Focus stacking is a tedious solution for when you can’t get all your favorite parts of the image in focus. I spent about 2 hours on each of these photos in Photoshop.
The one downfall of using a macro lens (I was using a Nikkor 105mm f/2.8) is that the closer you are to your subject the less you are able to get in focus. In other words, shooting into a deep glass, my lens might be able to make about an inch of depth sharp, but the rest of the detail will be blurry.
So what happens if you have 5 inches of depth and you want it all in focus? First make sure you’ve pushed the limits of your aperture (for the most depth of field use the highest number f-stop). If you still need more distance covered you can focus stack your images to create more sharpness in Photoshop later.
So, for each complete image, I also had to shoot several images that were focused at various points inside the image. I used manual focus, and after each shot I rotated the focus ring slightly to bring my focus point a tad closer in each consecutive shot. That’s the easy part… I will not even begin to tell you how I merged the resulting photos into one completely sharp image, but maybe I’ll make a video about it one day. Leave a comment if you’re interested in seeing this process at work. =)
One More Tip
If you need a larger screen you could use a tablet, laptop, or even a TV to do the same thing. The possibilities are really endless with this setup. I could spend a lifetime simply using different images on my phone and then swapping out the glass with other reflective surfaces… but I bore too easily to stay in that comfort zone.
Part 3 will reveal the shiny objects I used for the next part of the reflection series. Stay tuned!
Nov 18, 2016 |
Nothing is so intimidating as a blank page, an empty wall, a new project… the idea of making something out of nothing can be paralyzing. I’ve struggled with this my entire life.
Teenager me would carry around piles of paper in a 3-ring binder, I was always prepared – just waiting for inspiration. The lightning bolts I imagined must strike other writers and artists never struck me, though, so the pages remained mostly blank, aside from some roughness around the edges from my devoted carrying.
Yet, when I was a little kid, I created an entire book out of index cards, without hesitation, and laminated it with strips of scotch tape!
I don’t know what taught me to overthink creativity, or wait around for lightning strikes… but eventually I realized that inspiration is hardly ever convenient. Staring at a blank page never invokes inspiration for me. Making mistakes on a blank page does, though. Taking chances does too. Just making anything, even if it’s horrible, is the best way to find the little lightning bolts that will spark you to keep going.
My point is that inspiration will never be looking for you, you have to go find it.
P.S. Nobody taught me that lesson more than Melissa Dinwiddie, and if you’ve ever struggled to create anything, she has a new book that could change your life the way her concepts have changed mine.
You can even download the first 50 pages for free to see if it resonates with you. AND if you buy her book before 11/21 you get all kinds of launch week bonuses, so don’t wait!
Nov 16, 2016 |
Ever walk around your entire house looking for your car keys, only to realize you’re holding them? Me too, and that’s how I felt the first time I photographed a reflection and discovered it was only an illusion.
I mean, duh, reflections aren’t real, but I always assumed they existed on the surface of whatever shiny object made them.
While testing my gear before a pet session one day, I took a snapshot of a reflection bouncing off my phone. The resulting photo resembled a puddle; the reflection was sharp, but the phone, and the table below it, were totally blurred. Even more intriguing, in one corner of the image, several feet away, Gracie’s food bowl was in focus.
The reflection was of our backyard, streaming through sliding glass doors, and Gracie’s bowl was up against those doors. Since focus is determined by distance, it seems reflections are at the same distance as whatever they’re mimicing, but on the other side of the reflective surface.
Crazy, right? I’ve been obsessed ever since.
You don’t need a camera to see this, find a reflection in your screen and these words will blur. The keys were in my hand all along.

This is the silly snapshot that inspired the reflection series!
P.S. Do you have any title ideas for this photo? I’m not totally in love with the one I chose.
Aug 17, 2016 |
As I play and experiment I enjoy sharing my discoveries with you, so I always take behind the scenes photos of my sets, but it’s also really helpful for me to have reference photos to refresh my memory when looking back. The best way to grow is to continuously try new things, but what good is going somewhere new if you can’t remember how you got there?
When I started this series of reflections, I had initially intended to stick with literal reflections… but when I started building the set I found too many awesome images that didn’t fit into that category. That’s when I decided that I had to open up the definition of “reflection” to include my musings about the art I was making. Since my writing has become just as much a part of the art, it wasn’t a hard decision to make.
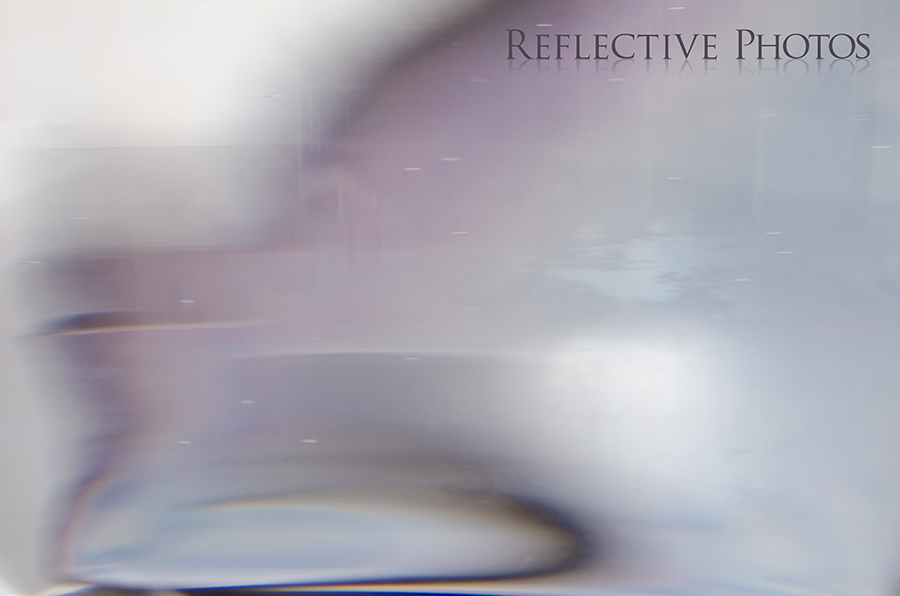
The first four images came from the basic setup below. I moved the props and camera slightly for each variation. That’s my favorite part about macro photography, when you zero in on just one tiny piece of the world any slight movement can totally alter your perspective.


The following images all came from some angle variation of this set. All were created by looking through the water-filled glass at the ceramic cloud dish behind it. The lighting stayed the same for all of them. I bounced two flashes off the white ceiling (which you can’t see here =/) for soft, even lighting.
Read my reflections of each image with the link in the caption or click the image to find it in my shop.
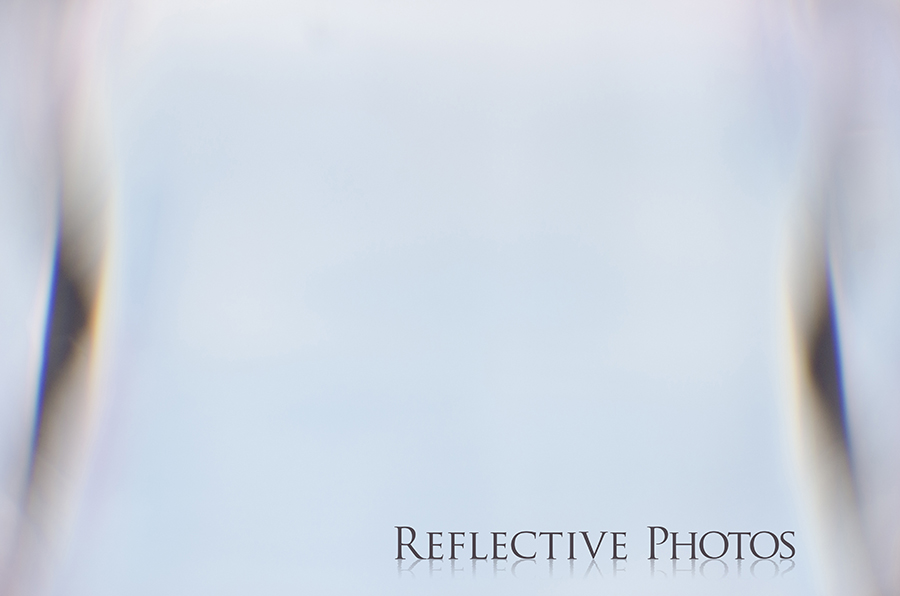
The next image came from a similar set, I just changed the prop from the cloud dish to a glass seahorse, and I added in a purple background.

This is how I found a Grumpy moon.
With the intention of actually photographing literal reflections, I was sidetracked yet again. Yes at this angle, shown below, I did see a reflection of the seahorse, but because the reflection didn’t run parallel to the plane of my lens, I couldn’t focus on the entire reflection.

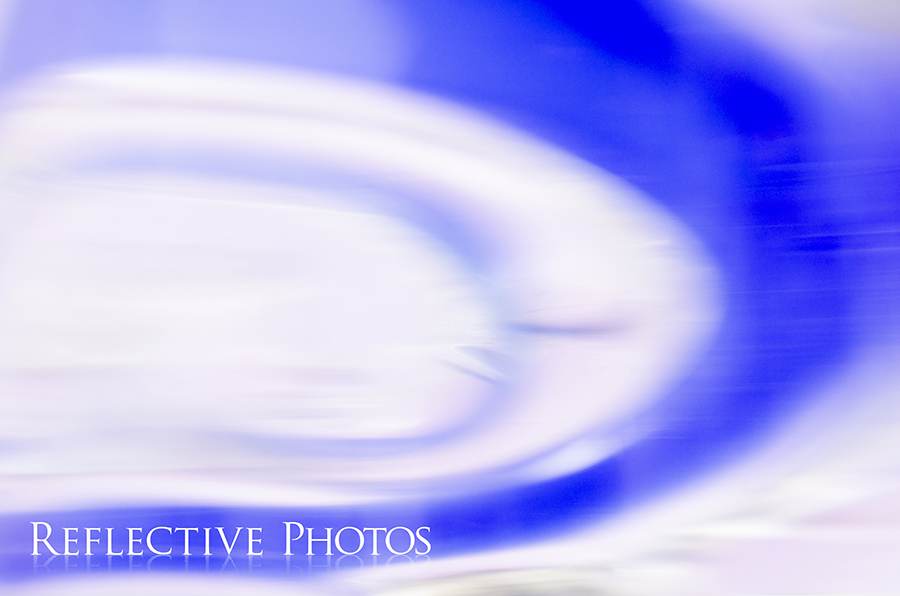
That swirly blue thing is a handmade, glass, spoon rest I found on Etsy. I have two of them, one I actually use for spoons, but this one I use as a candle holder on my kitchen table. The simple fact is that it’s so beautiful, I ended up getting rid of the seahorse and just capturing my favorite part… no reflections included.
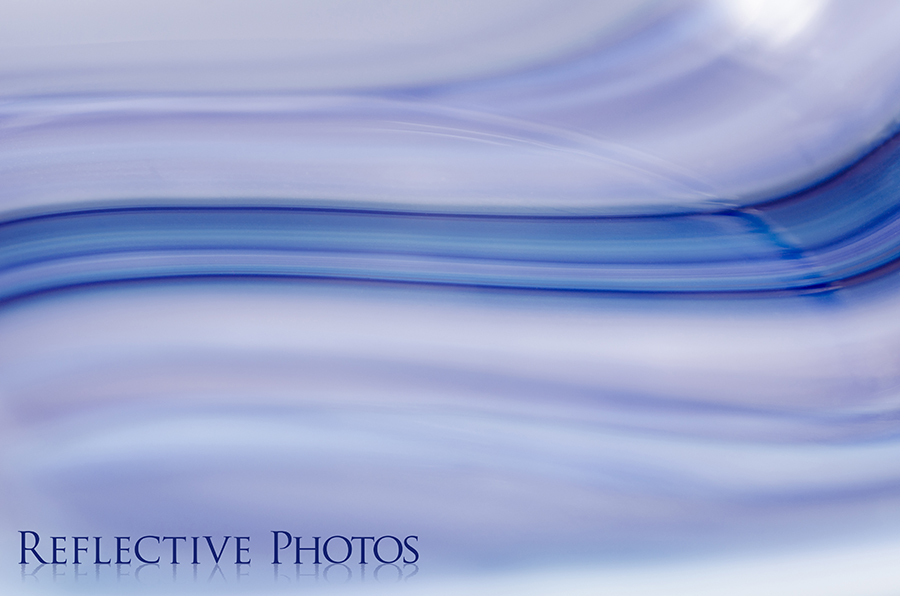
Finally, I figured out how to position everything so that I could capture my ideal reflection. Instead of shooting down on the surface of the spoon rest, I propped it up vertically, and that made things infinitely easier.
Shooting straight down came with several problems, one being that my tripod doesn’t have much flexibility in a totally downward configuration, but the bigger problem was getting the seahorse into the reflection hot spot… and with my 1st attempt the figurine would have to either be hung up somehow or rest on a transparent surface to get in that spot… too much work!!

I’d been examining reflections for months before I decided I was obsessed enough to pursue them long-term, so I knew exactly how I wanted to light the seahorse. Backlit subjects always make the prettiest, and most popping, reflections. I didn’t want any harsh reflections from the lights, so I used a big diffuser to soften the two flashes and simulate one big light source.


Here are the reflection photos I made with the above set up:
To make this last image I just took one of the above reflections totally out of focus… pretty bokeh.
Of course, no behind the scenes post should be without my Moo, so here she is snoozing in the studio while I do all the work. Doggie snores are meditative, though, so it’s ok.

If you want to get more behind the scenes of the reflection series, check out part 2!
Apr 22, 2016
About Life’s a Blur: A photography series that experiments with long exposures and motion blur. Every photo is a combination of movement mixed with a still subject. I’d like to think of each photo like a meditation: stillness in a sea of chaos.
These photos are also part of my Photo and 100 Words project. Since January 2014, I’ve been creating a new photo and writing about it every week. If you’re interested in finding out what prompted me to begin you can read the introduction over here.
(If you’re new to this photography series you might want to read how it all began in Part 1)
The Best Photography for the ‘Worst’ Conditions
This is going to be the briefest behind the scenes post ever, because I’ve already totally explained how to create photos similar to these back in part 2. So I’m posting this mostly so you can compare the before and after shots and see what kind of scenery has the most potential.
I will say that this is the perfect kind of photography to do at noon on a sunny day, which is probably my favorite part! Most kinds of subjects don’t look great at all in direct sunlight, especially harsh, mid-day light. In the case of these blurred scenes, though, the harsher the light, the better. You’ll never be able to use the “golden hour” excuse with this technique… although, as you’ll see below, the golden hour works just fine too.
The spring set of Life’s a Blur:
As is usual with these posts I’ve provided links to the original 100 words I wrote to go along with each photo, just in case you want to dig deeper into my world =)
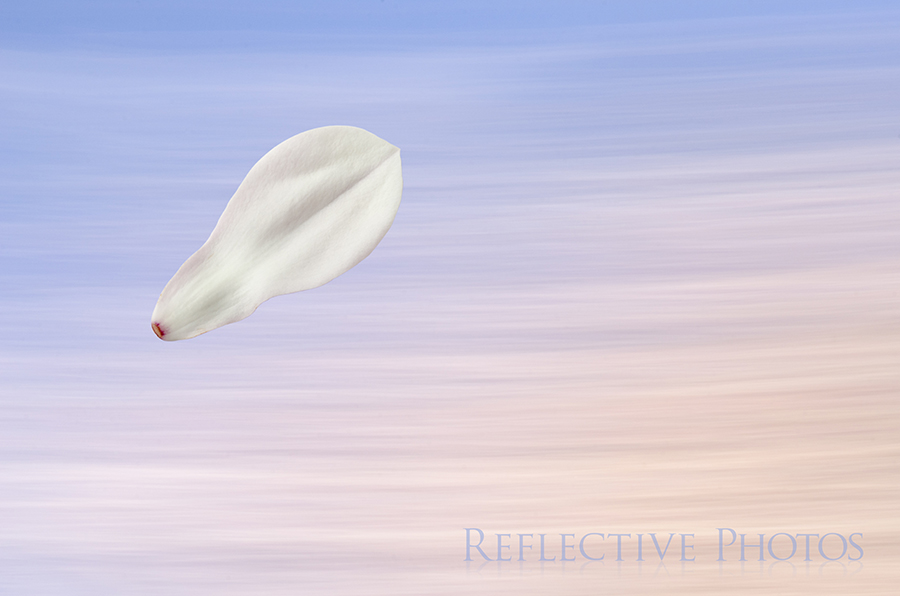
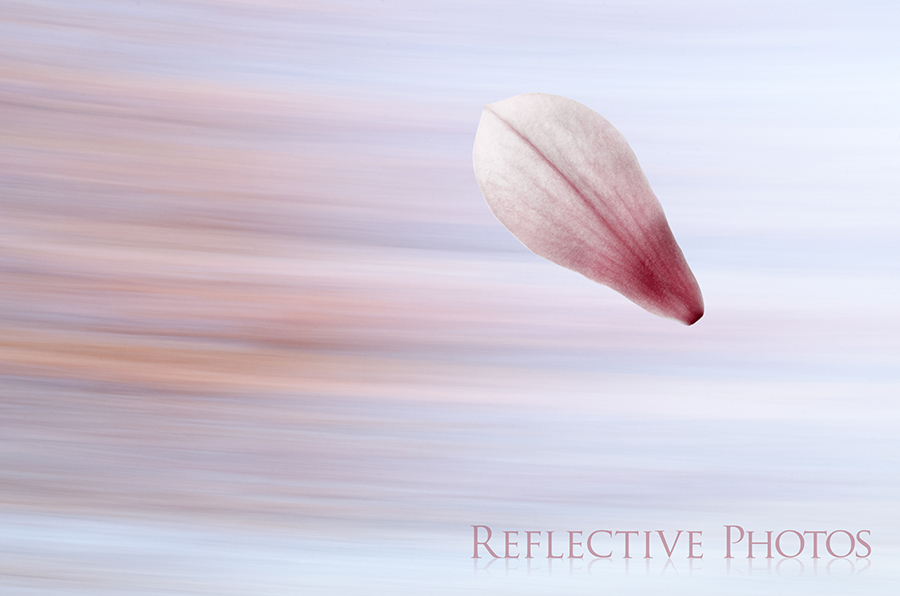
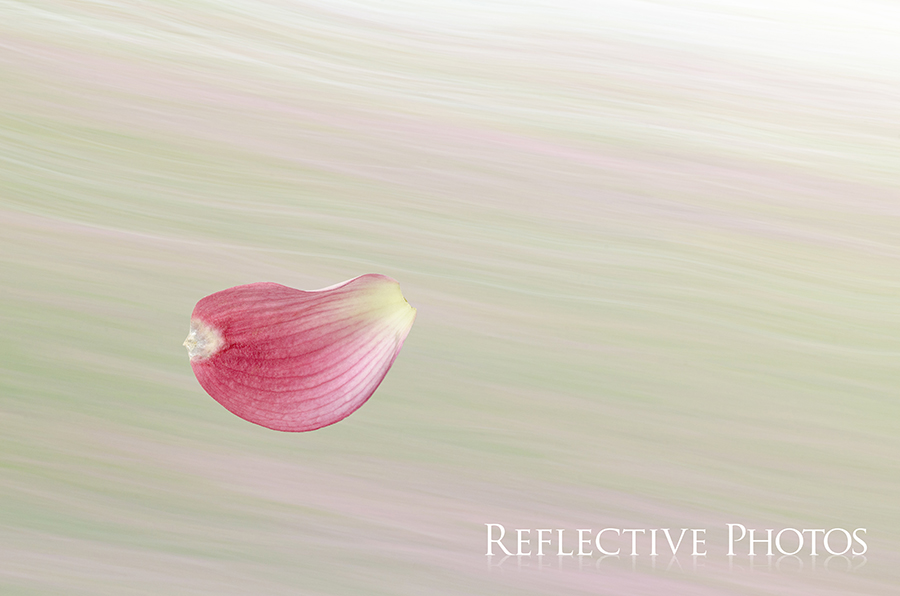
Magnolia Petal in the Breeze
This photo is for sale… click on it for more details.
I don’t know what it was, maybe just the pink and blue, but this image sparked me to write about Baby Season.

A snapshot of the background scene before I blurred it in camera to create “Magnolia Petal in the Breeze” and “Shell of a Flower.”
I really encourage you to experiment with each scene! In petal shot above, I got a little more blue by keeping more of the sky in my frame, and I got more pinks and purples by filling my frame with the flowers in the photo below. Both images came from the same scene, though, and you can alter the positioning of colors and the angle of the streaks by moving your camera in a different direction or starting and ending in different areas of your scene. Experiment, experiment, experiment!
Shell of a Flower
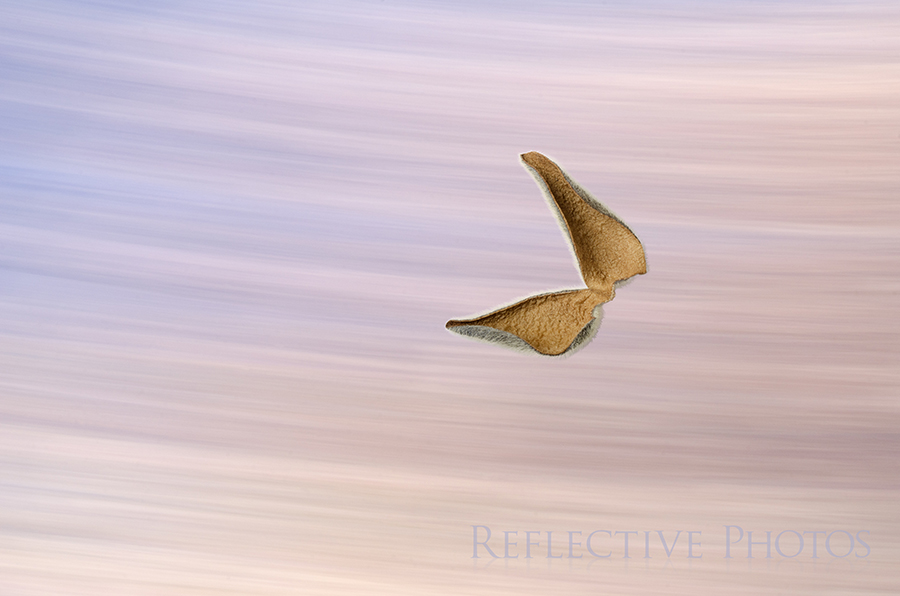
This photo is for sale… click on it for more details.
I posted this photo along with a brief account of what it was like to sit under this majestic magnolia tree, I was Afraid to Blink.
Magnolia Petal Swept Away
This photo is for sale… click on it for more details.
I examined everything Bittersweet when I first published this photo.

A snapshot of the background scene before I blurred it in camera to create “Magnolia Petal Swept Away.”
This image was shot during the infamous golden hour, as the sun was going down, if you like warmer colors you might still shoot for this time of day. Personally, I’m usually unavailable during this time, so if you’re like me and your schedule is booked during the oh-so-precious golden hour light, just warm up your white balance bar in post. (That won’t work at all for typical landscape photography, but with these abstract scenes, no one will know the difference, promise!)
Sugar Maple Flowers Blow Away
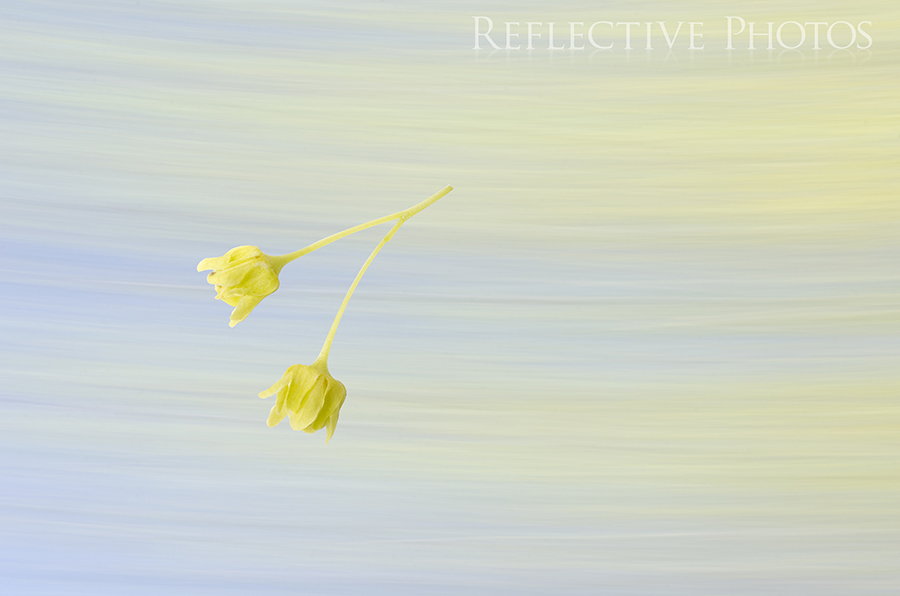
This photo is for sale… click on it for more details.
In Flying Solo I travel back to my teenage years into a memory that was sparked by this photo.

A snapshot of the background scene before I blurred it in camera to create “Sugar Maple Flowers Blow Away.”
Forsythia Flight
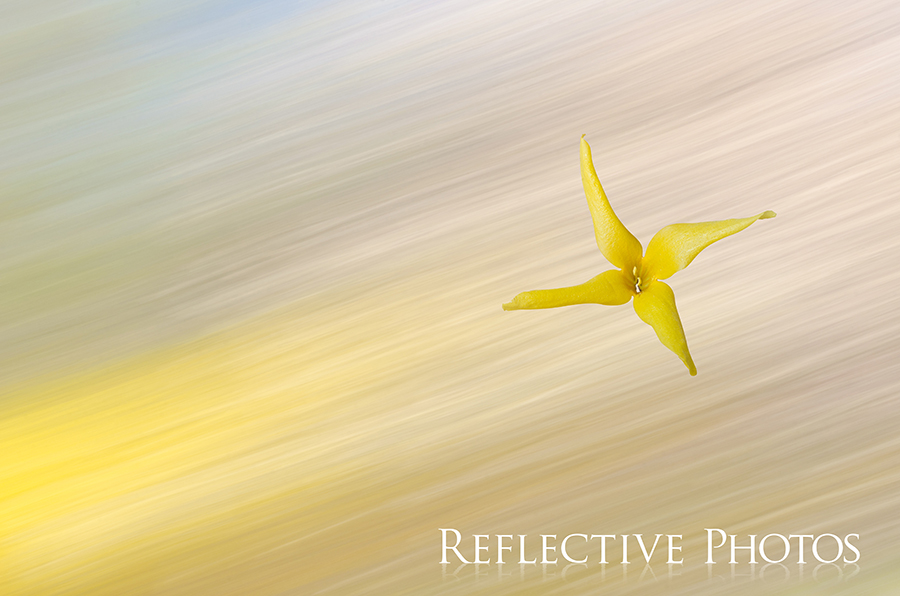
This photo is for sale… click on it for more details.
I realize this every year, but spring is not always as sweet as it seems, read my thoughts in A Stinky Spring.

A snapshot of the background scene before I blurred it in camera to create “Forsythia Flight.”
When I moved my camera horizontally along this scene I ended up with ugly black stripes where the power lines were, but if I moved in any other direction they disappeared. Diagonally seemed to work best for my tastes with these colors!
Dogwood Petal’s Dream
This photo is for sale… click on it for more details.
Sometimes I have A Sick Sense of Humor about the world…

A snapshot of the background scene before I blurred it in camera to create “Dogwood Petal’s Dream.”
Pink Petals Fly
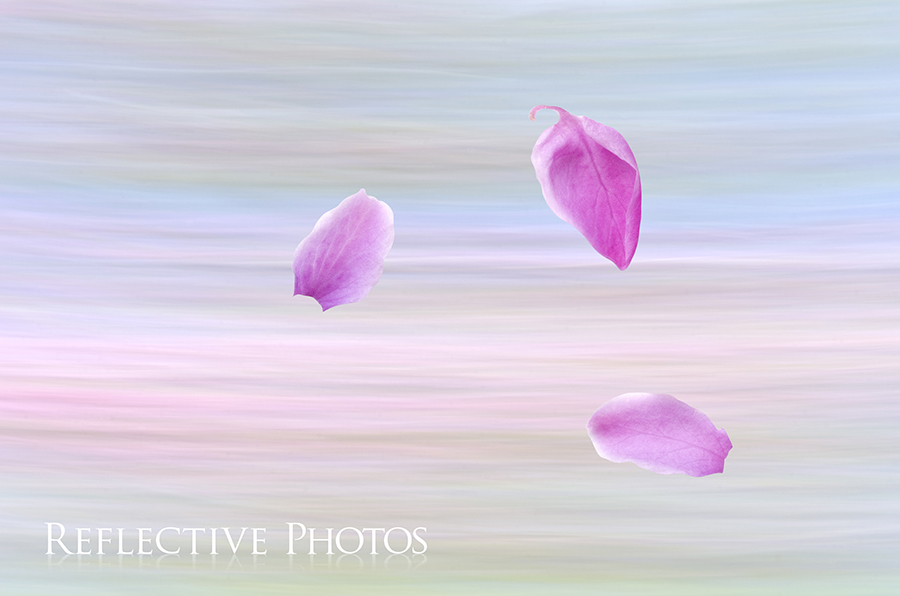
This photo is for sale… click on it for more details.
I suddenly realized that the entire theme behind the Life’s a Blur series is has gotten so far away from me! Isn’t it Ironic?

A snapshot of the background scene before I blurred it in camera to create “Pink Petals Fly.”
This scene was tricky. I had to get in really close to get enough of that pink and purple color I was aiming for. This redbud tree was pretty small and there weren’t that many flowers on it, especially at a distance.
Redbud Flower Flight

This photo is for sale… click on it for more details.
Read Slowing Down in this Blur to experience one of my most memorable moments!

A snapshot of the background scene before I blurred it in camera to create “Redbud Flower Flight.”
This scene is similar to the last one, but the slight angle change mixed with a diagonal movement of the camera creates a whole new abstraction!
What’s Next?
Well that’s it for Life’s a Blur, but the good news is that you can now access all the behind the scenes content in the links listed below!
How it All Began – Life’s a Blur – Behind the Scenes – Part 1
Fall Scenes – Life’s a Blur – Behind the Scenes – Part 2
Water Flow and Flowers – Life’s a Blur – Behind the Scenes – Part 3
How to Photograph Snowflakes – Life’s a Blur – Behind the Scenes – Part 4
Creating Surreal Showers – Life’s a Blur – Behind the Scenes – Part 5
In the meantime I’m creating a whole new series right now! In honor of my business name, Reflective Photos, I’m going to be playing around with reflections and distortions to create some fun abstract art. This is partially because I’ve recently become fascinated with reflections, in both the literal and the figurative senses, but also because I know that “reflective photos” is a popular Google search term that finds this site. So why not give the Googlers what they want?
If you want to get my new photos, and more behind the scenes info, like this, delivered to you inbox, make sure to sign up below.
Feb 26, 2016
About Life’s a Blur: A photography series that experiments with long exposures and motion blur. Every photo is a combination of movement mixed with a still subject. I’d like to think of each photo like a meditation: stillness in a sea of chaos.
These photos are also part of my Photo and 100 Words project. Since January 2014, I’ve been creating a new photo and writing about it every week. If you’re interested in finding out what prompted me to begin you can read the introduction over here.
(If you’re new to this photography series you might want to read how it all began in Part 1)
This photo is for sale… click on it for more details OR read the original post I wrote about it: “Reaching for Dreams“
The concept seemed simple: make it rain. The execution was a bit more complicated, but that was mostly my own fault…
I started out with a bouquet of flowers, a purple backdrop, and a pile of homemade confetti made by sending some construction paper scraps through our paper shredder. Shout out to Nick for simplifying that process! I had intended to use scissors.
I planned on taking long exposures of the flowers and dropping the confetti in the background to create a streaky, rainy effect.
It was only as I was pulling my flashes out of my bag, that I realized I had already run into a problem! I forgot to bring home hot lights from the studio.
A Lesson in Lighting
For those of you who are new to off-camera lighting, there are generally two options: strobes and constant light. The main difference being that constant light stays on and strobes only flash when the camera takes a photo.
There are lots of reasons you might consider using one over another, but for the purposes of this example I needed constant light because I intended to capture long exposures. Flashes tend to freeze motion and would totally negate the soft effect I was going for.
I could’ve waited for the next weekend to come around… or maybe not, I don’t really remember what I had going on at the time, but I don’t have that kind of patience anyway! And so the problem-solving began…

I decided to use my living room lamp as a constant light source. It had three bulbs on it and they were semi-adjustable, so I turned all three of them on and pointed them in the same general direction to even out the lighting on my backdrop. More importantly, the lamp was also going to be lighting the confetti in the background.
The next problem was two-fold. I only had one lamp, so that meant I had to use at least one flash to light up the flower.

First of all, mixing light sources is generally not a good idea because every light has its own colorcast. The lamp was putting out yellowy light compared to the bluish light my flash puts out.
I fixed that issue by balancing the lights with gels, which are just colored sheets of transparent plastic. It just takes a bit of time and experimentation to get it right, but I ended up covering all of the lamp lights with blue gels to negate the yellow, and I did the opposite with my flash by covering it with a yellow gel.

The second problem with using a flash on the flower was that I was also blasting the confetti with the flash too. This created a simultaneously soft and frozen look; there were streaks of color from the confetti lit by the lamp, but there were also hard dots specked across the background that froze when the flash fired. Awesome effect, but it’s not what I wanted.
I had to experiment with some matte board to find the sweet spot where I would block the flash from hitting the confetti but still allow enough light onto the flower. Eventually I got it right!

Then I added in another matte board, covered in aluminum foil, to fill in the right side of the background and bounce more lamp light back into the confetti. I’m sure I had to tweak that angle too, in order to avoid bouncing any light from the flash into the confetti as well.
You might also see that I have a giant reflector above the whole set, and I can’t remember what that was for, but I’m going to assume it was further flash blockage, and lamp light bounceage, on the background area.
More Photos Made from this Setup:
Click the links below each image to read the original 100 words of reflection they inspired! Each image is also available in my art shop, so just click on the images if you are interested in purchasing any of these for you wall.
Warm Rain on a Cool Night
This photo is for sale… click on it for more details.
This image came out alongside my 100-word perspective on why “Rain is Never Gray.”
Towering Twin Flowers
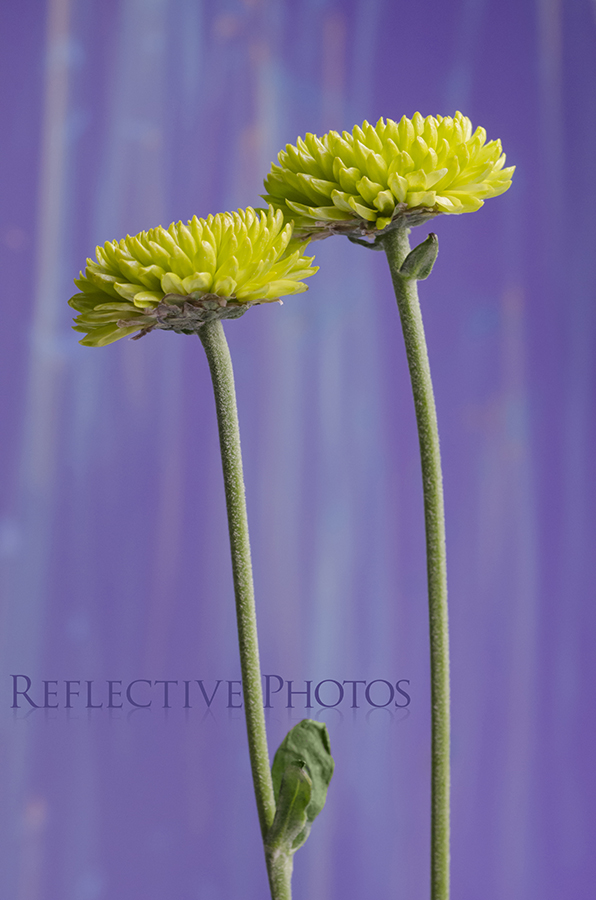
This photo is for sale… click on it for more details.
I have a strong dislike of green backgrounds… and you can read why in “Naturally Unnatural.”
Surreal Showers on Flowers
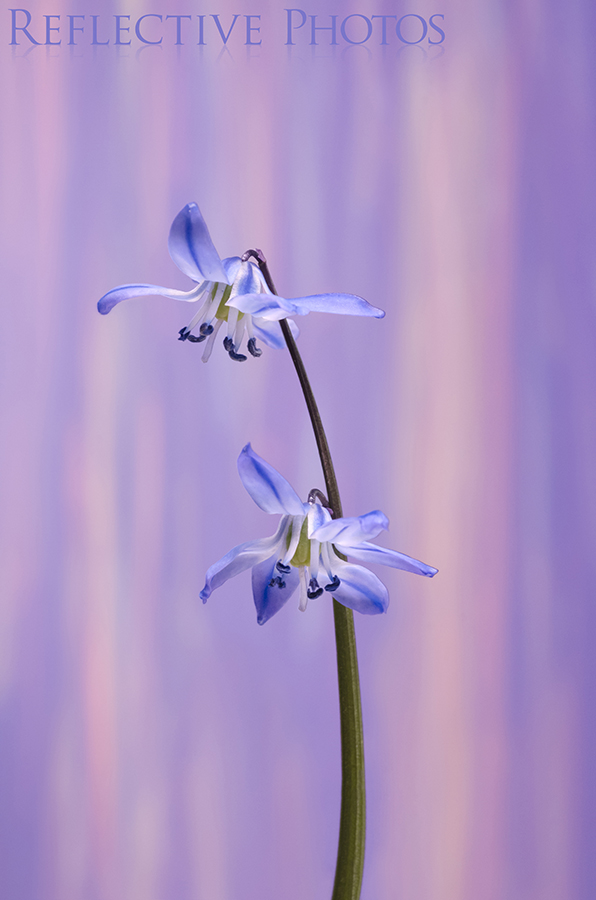
This photo is for sale… click on it for more details.
I’m constantly amazed at how much more I have yet to discover in my own back yard, that’s what I wrote about in “Spring Sprung New Flowers,” when this photo was first published.
Starfighter Lily Fights the Blues
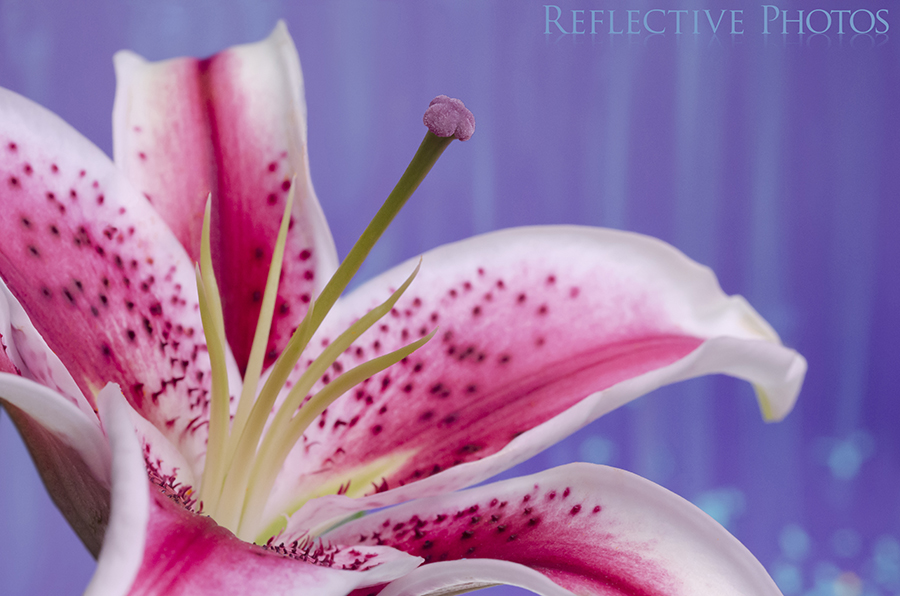
This photo is for sale… click on it for more details.
I hate when my fellow creative use lack of inspiration as an excuse not to create, and that’s what I wrote about Inspiration is for Lazy Artists.
Learn from My Mistakes!
If I had it to do over, I would NEVER do it this way! It’s a great example, though, of how anything is possible with a little creativity and what you already have.
This is also the last time you’ll see behind the scenes photos in my old studio – ahem – kitchen/living room. All future photos will show off my new studio space! I don’t know about you, but that gives me reason for celebration!
What’s Next?
You’ll get to see what my spring scenes looked like before and after I blurred them in my camera. The technique is the same one I used for parts 2 and 4 in this series, so check the links below if you want to learn more.
This will be the last behind the scenes post about the Life’s a Blur series. If you’re new here, though, you might’ve missed my previous posts on creating motion blur with long exposures!
How it All Began – Life’s a Blur – Behind the Scenes – Part 1
Fall Scenes – Life’s a Blur – Behind the Scenes – Part 2
Water Flow and Flowers – Life’s A Blur – Behind the Scenes – Part 3
How to Photograph Snowflakes – Life’s A Blur – Behind the Scenes – Part 4
Update: Part 6 is now available if you want to get a glimpse behind the spring set of Life’s a Blur!
Dec 24, 2015 |
About Life’s a Blur: A photography series that experiments with long exposures and motion blur. Every photo is a combination of movement mixed with a still subject. I’d like to think of each photo like a meditation: stillness in a sea of chaos.
These photos are also part of my Photo and 100 Words project. Since January 2014, I’ve been creating a new photo and writing about it every week. If you’re interested in finding out what prompted me to begin you can read the introduction over here.
(If you’re new to this photography series you might want to read how it all began in Part 1)
Why Snowflakes?
I really didn’t know what I was getting into when I decided that snowflakes were the subject I’d be approaching. The truth is, snowflakes were the only subject I could think of that would be flying across a winter scene, so I was determined to make it work.
It took me 2 snowfalls to get anything at all, and it wasn’t until my 3rd attempt that I actually got the images that were used in this series. It was not easy, and it certainly tried my patience… but it was worth it. I learned a lot and, in the end, I was really happy with my results!
How to Photograph Snowflakes
Patience and persistence… that’s the real answer, but if you’re really going to attempt to capture some snowflakes this winter, maybe I can help you to avoid some of the mistakes I made!
You’ll Need:
- Camera with macro lens – but you already knew that right?
- Clean, cold, and dry surface – I recommend plexiglass in order to backlight with an LED light, but for a simpler setup a piece of black fabric will give you the best contrast in natural light.
- Towel or paper towels – to wipe your surface clean so you can catch more fresh flakes.
- Toothpick – you don’t want to use even gloved hands to try and move snowflakes, they might break or melt.
- Index Cards – or something similar to transport the snowflakes
- Tripod
- A cooler (optional and only if you want to replicate my setup)
- LED light or other continuous light source (optional)
- Colored Gels (optional)
My Setup

The photo above is a recreation of what I set up last winter so that I can show you the general idea. I guess my brain was frozen when I shot these, because I totally forgot to take photos before I broke down my set and took my numb ass inside. Whoops!
I used a cooler because it was the perfect size to support the small piece of plexiglass I wanted to use. The white interior gave me some extra light too.
I was using an LED ring light that has the option to put out continuous light. I covered half of the light with a blue gel and the other half with a magenta gel.
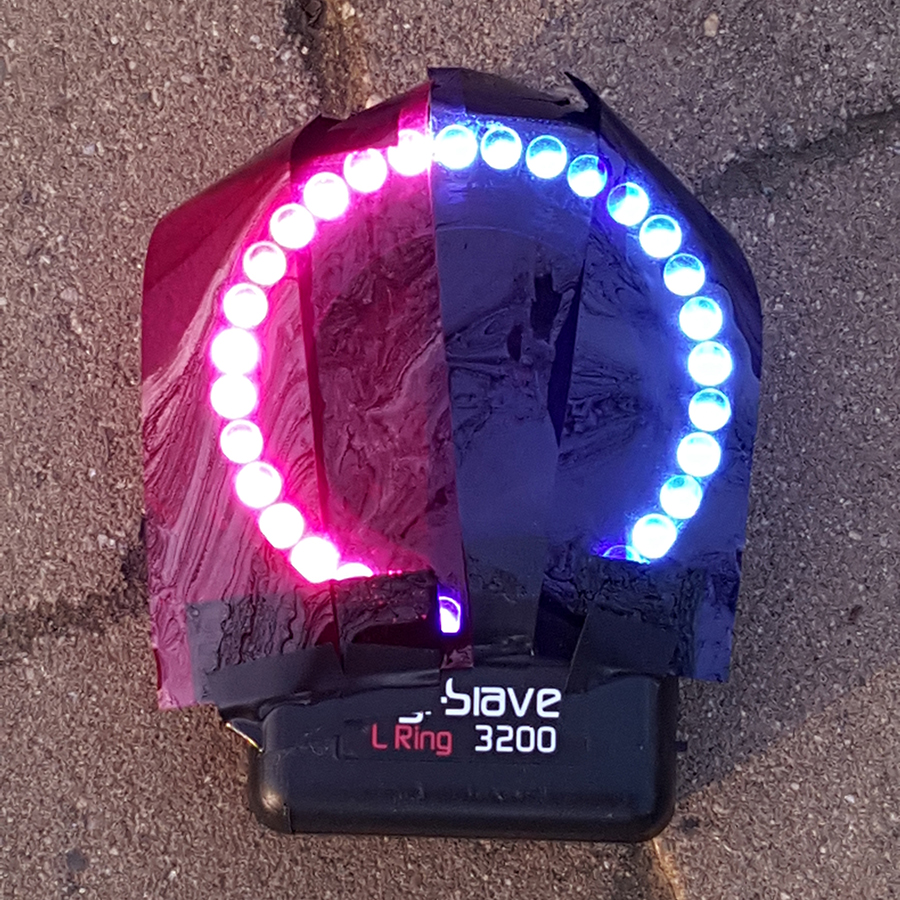
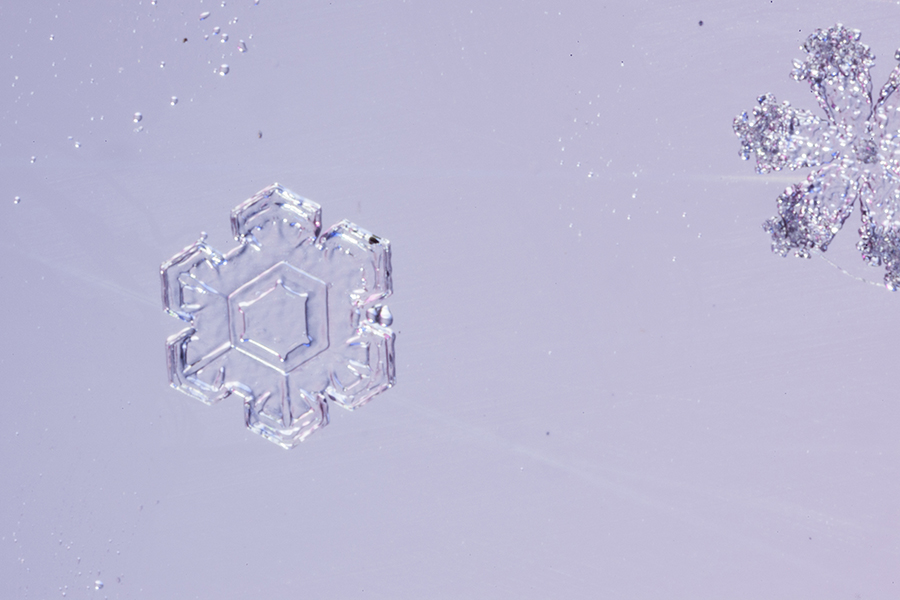
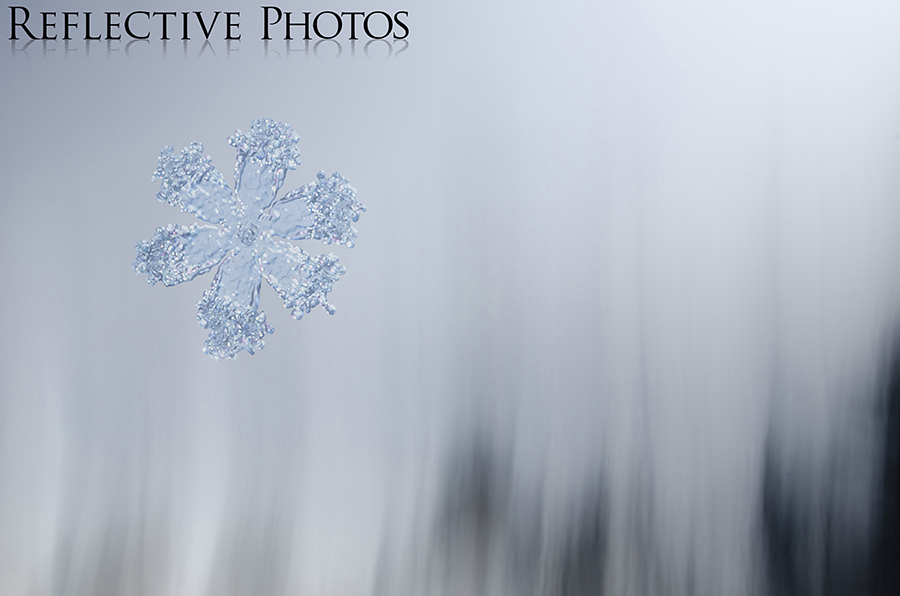
I really loved the effect of the colored light, but I ended up altering the color later on because it didn’t fit right into my snowy scenes. Here is one of my snowflake captures before I processed it and removed the background.
Here are a few tips you might want to consider before you make an attempt at snowflake photography:
Tip #1 Get prepared now!
Even if there’s no snow in your forecast, you never know when the first flurries might start to appear, and if you wait until then, you’ll probably be too late.
You want to put all of your materials outside right now, preferably under cover. (All except your camera and lens, of course.) You have to remember that snowflakes are delicate and your materials will melt them if they haven’t had enough time to chill down from indoor temperatures.
Tip #2 Fresh snow is the only good snow
You really have to catch the snowflakes as soon as they fall out of the sky. You can’t use the snow on the ground because the crystals will clump together and all you’ll get are chunks of ice that aren’t too attractive.
Sometimes, even the fresh snow is ugly! Not all snowflakes have those beautiful six-sided designs you’re thinking of. I got only 1 recognizable snowflake after three hours of snowfall the first night I tried.
Tip #3 Get under cover
It may seem obvious, but you will want some protection from the elements. You don’t want fresh snow falling on top of the snow you’re trying to photograph, and you don’t want the wind blowing your snowflakes away. Plan ahead for a space that will protect your set without melting your snowflakes. A covered porch, a shed, a garage, a tent, or even the back of your car could work.
Tip #4 Move your snowflakes, not your camera
At first my set was completely different. I had a bigger piece of plexi, propped up at a 45 degree angle so that I could easily move my camera to the snowflakes without moving them. I don’t know why I thought this would be easier, or if I even thought, haha, but turns out moving the snowflakes is waaaaaaay easier.
Just make sure you have a toothpick and a few index cards pre-chilled so you don’t melt the flakes. Eventually I used another piece of plexi to collect and search for good snowflakes, and simply pushed them onto an index card and carefully transported, and slid them in front of the lens. Practice with a few damaged snowflakes before you go for the precious good ones.
Tip #5 Work at night
If the sun is your light, then obviously you can’t take this tip. Personally, I like to have full control over my light, so my setup photo is a little misleading because every one of these snowflakes was captured at night using only the one ring light. This brings me to…
Tip #6 Backlight your snowflakes… or don’t…
I personally found that shinning light through the snowflakes instead of at them brought out more detail and gave them a more translucent look. If you want a more opaque look that might not be for you. I suggest you experiment with your light to find a look you love.
Next time I do this I will probably use two lights… the possibilities are endless, play with them!
Please Note: I learned about snowflake photography from the genius behind snowcrystals.com – last time I went to share this website with a friend, however, I found that all of the content regarding snowflake photography was gone. I’m guessing this is probably because his new book includes all of his amazing tips… I feel lucky to have come across the info before he deleted it! Kenneth Libbrecht’s snowflake photos are far superior to mine, though, and if you want more detailed information on this topic I’m sure you can find it in his new book, The Snowflake, Winter’s Frozen Artistry… but even if you don’t want to buy it, you’ll certainly be able to see some gorgeous snowflake photography over there, so check it out anyway!
Blurred Scenery
As I’m sure you’ve guessed, the background images were shot separately from the snowflake images. Unlike my fall leaf photos, earlier in this series, the snowflakes didn’t come from the same snowy scenes I photographed. Unfortunately, this just wasn’t possible, especially because my favorite backgrounds were created on sunny days without a snowflake in sight. Finally, I’ve discovered a photography technique that thrives in sunny, mid-day light!
Here are all of my final winter scenes followed by a snapshot of the original scene. Keep in mind that all blurring was done in camera and no Photoshop was used to blur these backgrounds. If you want the details of exactly how I created the background images, you can get the nerdy photo details in part 2.
I also added links to the original story each photo was published with, just in case you’re interested in getting more!
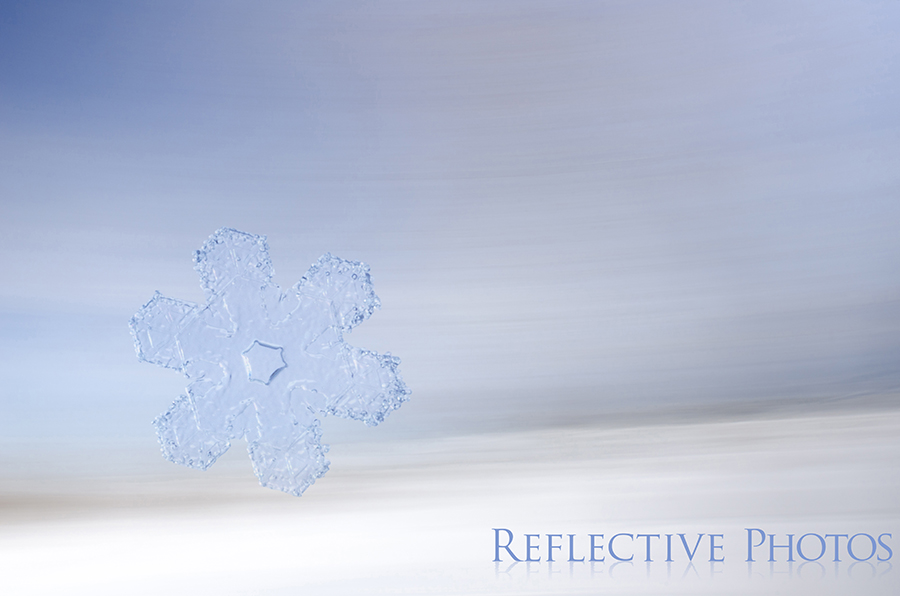
Crystalline to Crusty
This photo is for sale… click on it for more details.
Obviously, you can see that this snowflake isn’t exactly perfect… you can read about this OCD lady’s battle with accepting imperfection in Seeking Perfection.

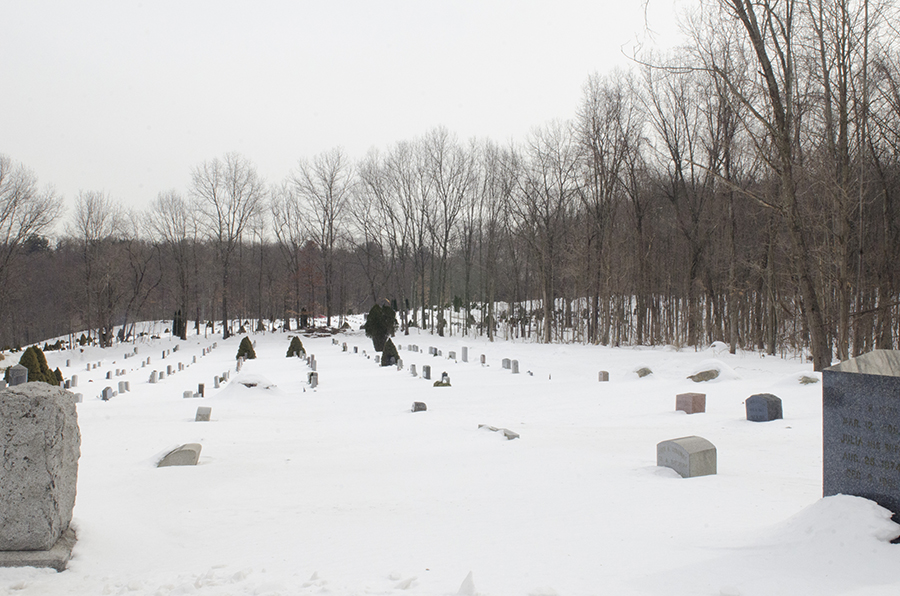
A snapshot of the background scene before I blurred it in camera to create “Crystalline to Crusty.”
Beachy Snowfall Scenery
This photo is for sale… click on it for more details.
I guess I just can’t keep my mind from seeing summer, even in a snowflake! Come on, you know that looks like a sand dollar… but no it actually is a snowflake, and that background actually is a snowy scene, see? Life’s a Beach was the original writing that went with this photo.
A snapshot of the background scene before I blurred it in camera to create “Life’s a Beach.”
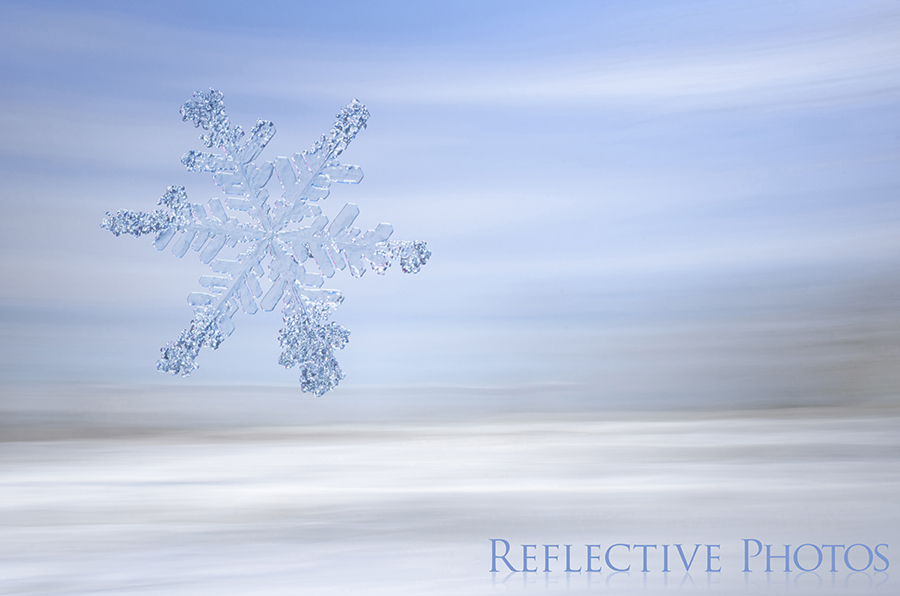
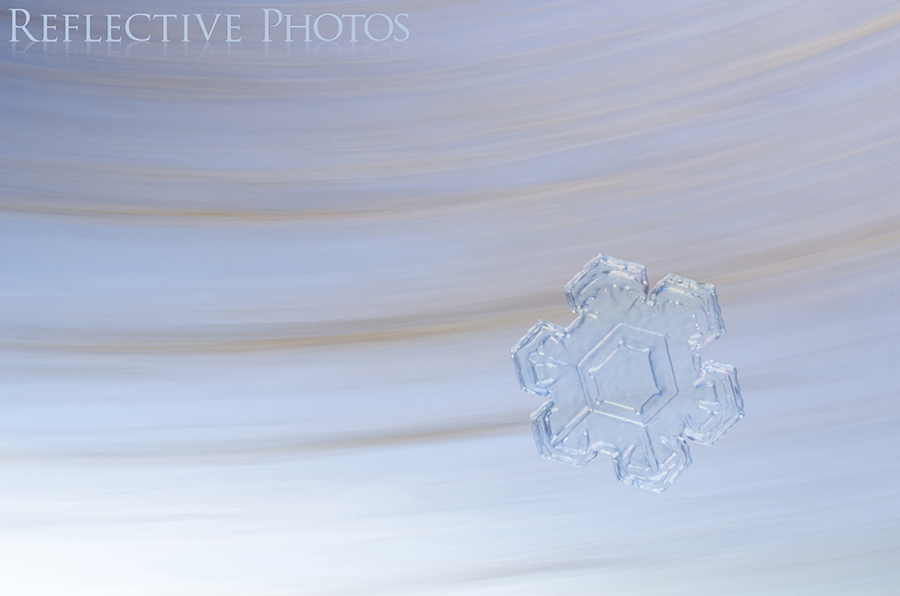
Breezy Snowfall
This photo is for sale… click on it for more details.
As I compared all of my finished photos, I noticed that they all had one thing in common, and it has to do with my favorite number, Six.
A snapshot of the background scene before I blurred it in camera to create “Breezy Snowfall.”
Swept Away Snowflake
This photo is for sale… click on it for more details.
I think I somehow ended up making a feminist statement with Girls Who Cry Snowflakes. I got a little personal too…

A snapshot of the background scene before I blurred it in camera to create “Swept Away Snowflake.”
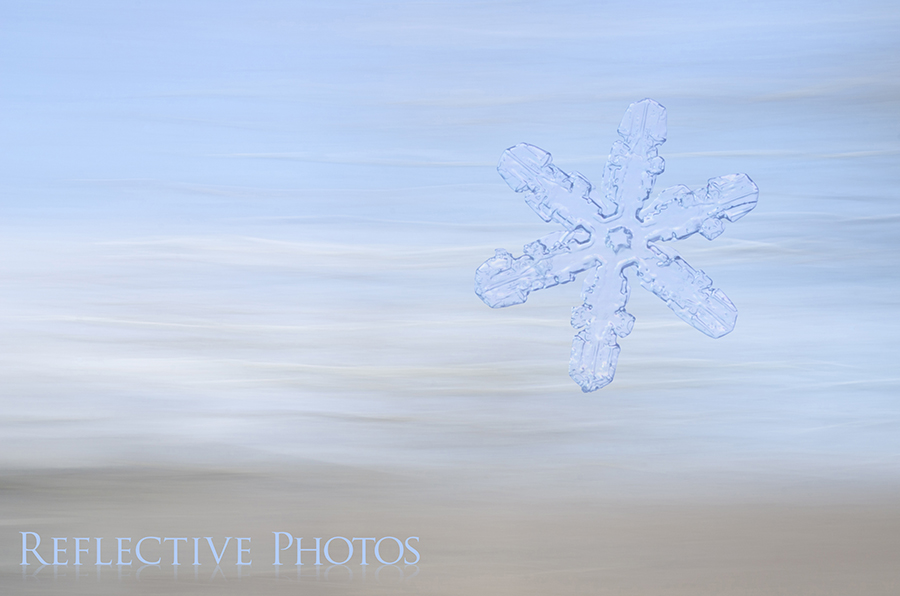
Hexagon Crystal
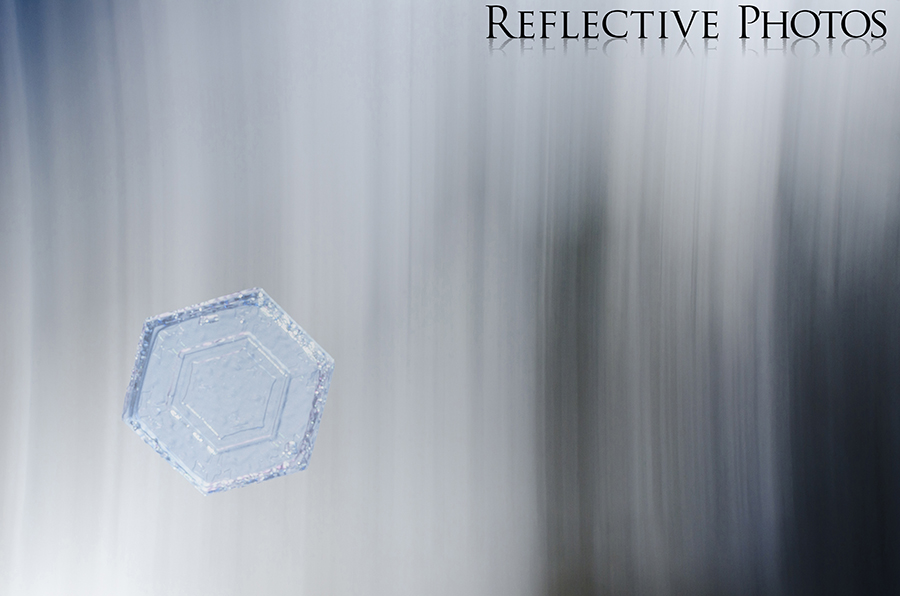
This photo is for sale… click on it for more details.
In Simplicity I wrote about the difference in achieving minimalism in photography and in writing… they are actually total opposites when it comes to approach, at least my approach.

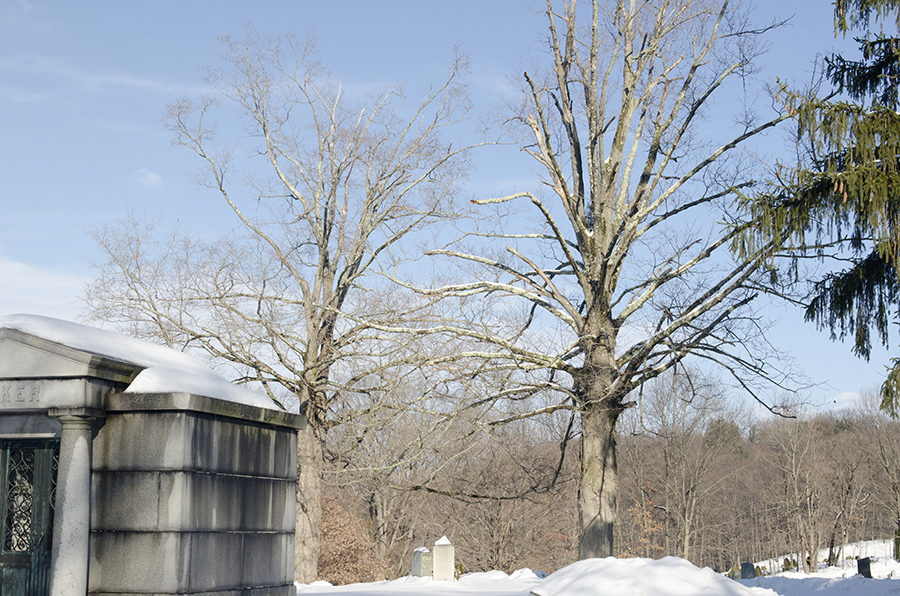
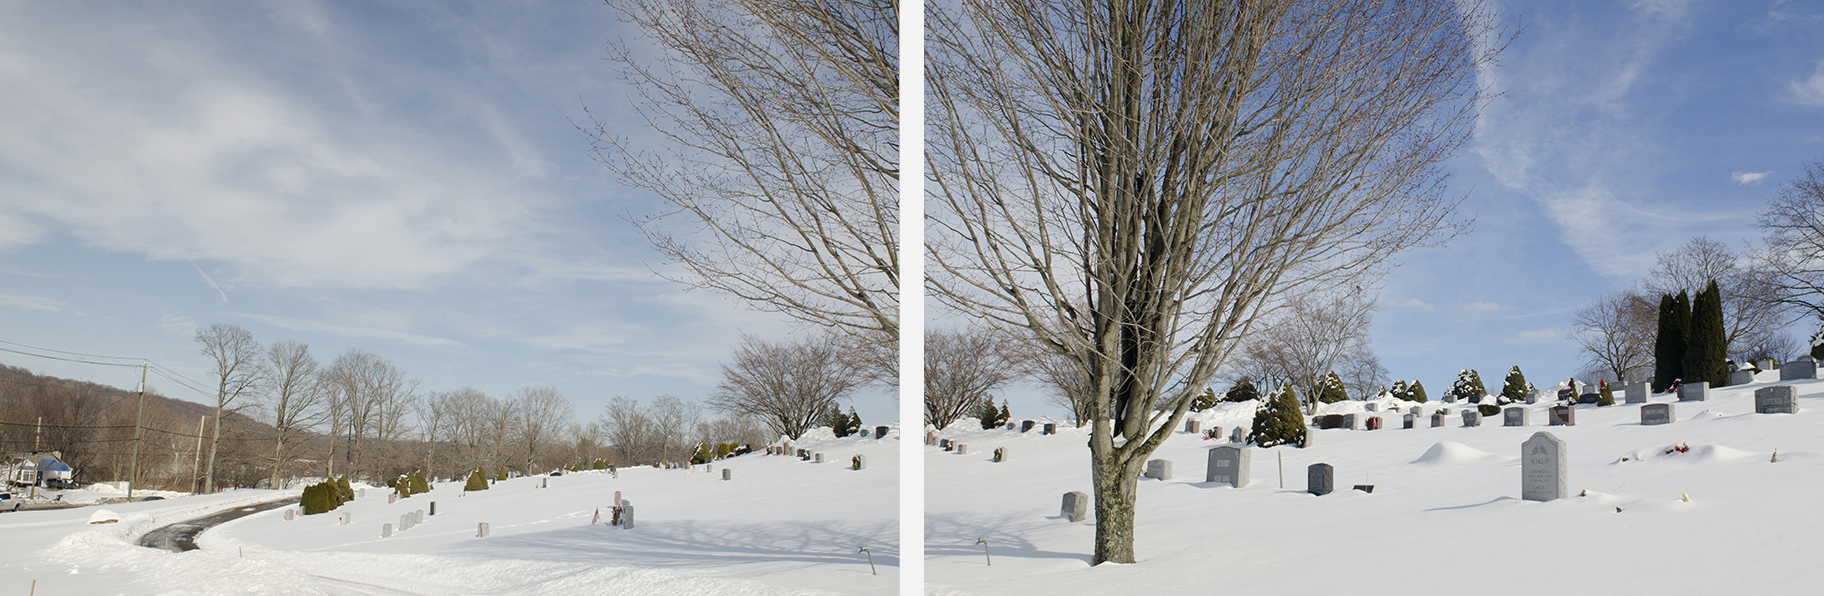
A snapshot of the background scene before I blurred it in camera to create “Hexagon Crystal” and “Icy Flames.”
Note: This image is the scene I used for both “Hexagon Crystal” and “Icy Flames” – I simply spent more time on the trees in the darker version and more time on the sky in the lighter version. I may have also reversed the direction that I blurred the image (from top to bottom and vice versa), but I’m not completely sure, my memory is shaky on that.
As I’m sure you can see I also added a blue tint by favoring the cold side of the white balance bar in my post processing. I did this to all of the images I shot on overcast days because everything was just so bleak and gray. I’ve come to find that the best days to do these blurred scenes are on sunny days with a few scattered clouds. These conditions make for the best contrast, which is ideal for visible blur lines.
Icy Flames
This photo is for sale… click on it for more details.
Persistence pays off was me whining about all the hard work it took to get my first snowflake, like I said, it wasn’t easy… but you can check out what the original image looked like on my 1st ever snowflake!
A Fine Flurry

This photo is for sale… click on it for more details.
A Glimmer of Hope is me trying to be positive when everything else seems to want me to go the other way.
A snapshot of the background scene before I blurred it in camera to create “A Fine Flurry.”
Once again, make sure you check out part 2 if you want the details on how to create abstract scenes with motion blur.
What’s Next?
In the next blog post I’ll be showing you how I made surreal rain for the colorful background of my latest flower photos… any idea what I used? This post is coming soon, if you don’t want to miss out, make sure you sign up below to be notified!
Happy shooting!
Update: Part 5 is now posted, find out how to create surreal rain for the backgrounds of your images.
Sep 30, 2015 |
Want this hanging on your wall? Click the photo to buy now!
I had just relearned how to eat ice cream from a cone, chocolate evidence was all over my shirt, and the laughs Nick and I shared energized our spirits as we drove home from Joe’s Dairy Bar.
Occassional sparks illuminated the fluffy, dark purple clouds and zig-zagged down through the pink sky. I slowed the car and we gawked at the gorgeousness of it all.
At home, we sat in the backyard, watching those windswept wisps fly by and listening to the magical sound of the wind chimes for the very first time. The pink sky turned periwinkle, then deep blue, and two bats’ dancing silhouettes fluttered against it.
Something bounced on the patio and Gracie was on it like the black on those bats. The toad got drooled on, but we saved him from becoming a doggie snack.
The sky darkened and something swooped into the bushes and hovered there. A hummingbird? No. A moth the size of my fist, swaying with the branches to hide from the bats.
Friday nights are for us. Movies, video games, or maybe just a snuggle chat… oh my. This was, so far, the most memorable, magical of those nights.
What are these numbered posts all about? Read the introduction to my Photo & 100 Words project and find out!
Jul 3, 2015 |
Want this hanging on your wall? Click the photo to buy now!
Under the magnolia tree, I sat on a gravestone to rest. It was a hot day for early spring and I was cooling off in the dappled shade, and getting mesmerized by the glistening sun spots that quivered with the breeze. Every breath of wind sent pink and white petals floating and flipping to the ground.
When you stick your face to the back of a camera, all of your energy is pointed at a single perspective. It’s surprisingly easy to miss everything that’s going on around you.
Relaxing against the cool stone, my gaze floated across the flowery floor. Jutting out between petals were these little brown bunny ear looking things. Once I saw one, I saw them everywhere.They were like little cocoons, I realized, that held in the flower until its beauty was ready to burst.
In a few weeks, I thought, there will be nothing left under this tree but dirt and grass. If you blink, it seems, the flowers have fallen, they melt back into the earth, and it’s like they never existed. Life is truly a blur.
What are these numbered posts all about? Read the introduction to my Photo & 100 Words project and find out!